
Manage contacts
Configure Contact Synchronisation
The Voyado Engage Add-on allows you to handle synchronisation of contacts as the Add-on
- creates contacts in Voyado, if customers create an account in SCAYLE
- updates contacts in Voyado, if customers are updated in SCAYLE
- deletes contact in Voyado, if SCAYLE customers are deleted / anonymized
Activate contact
- Go to
Add-Ons > Voyado Engage Add-On > Contacts. - Select the events you want to enable.
- Click SAVE.
Contact field mappings
For the contact synchronisation most of the field mappings are predefined (SCAYLE system fields are mapped to corresponding Voyado system fields). However, you can optionally remove some of the mappings.
- Go to
Add-Ons > Voyado Add-On > Contacts. - In the Newsletter section, click More.
- Select the Field Mappings from the dropdown options.
- Remove the chosen field (optional).
- Click SAVE.
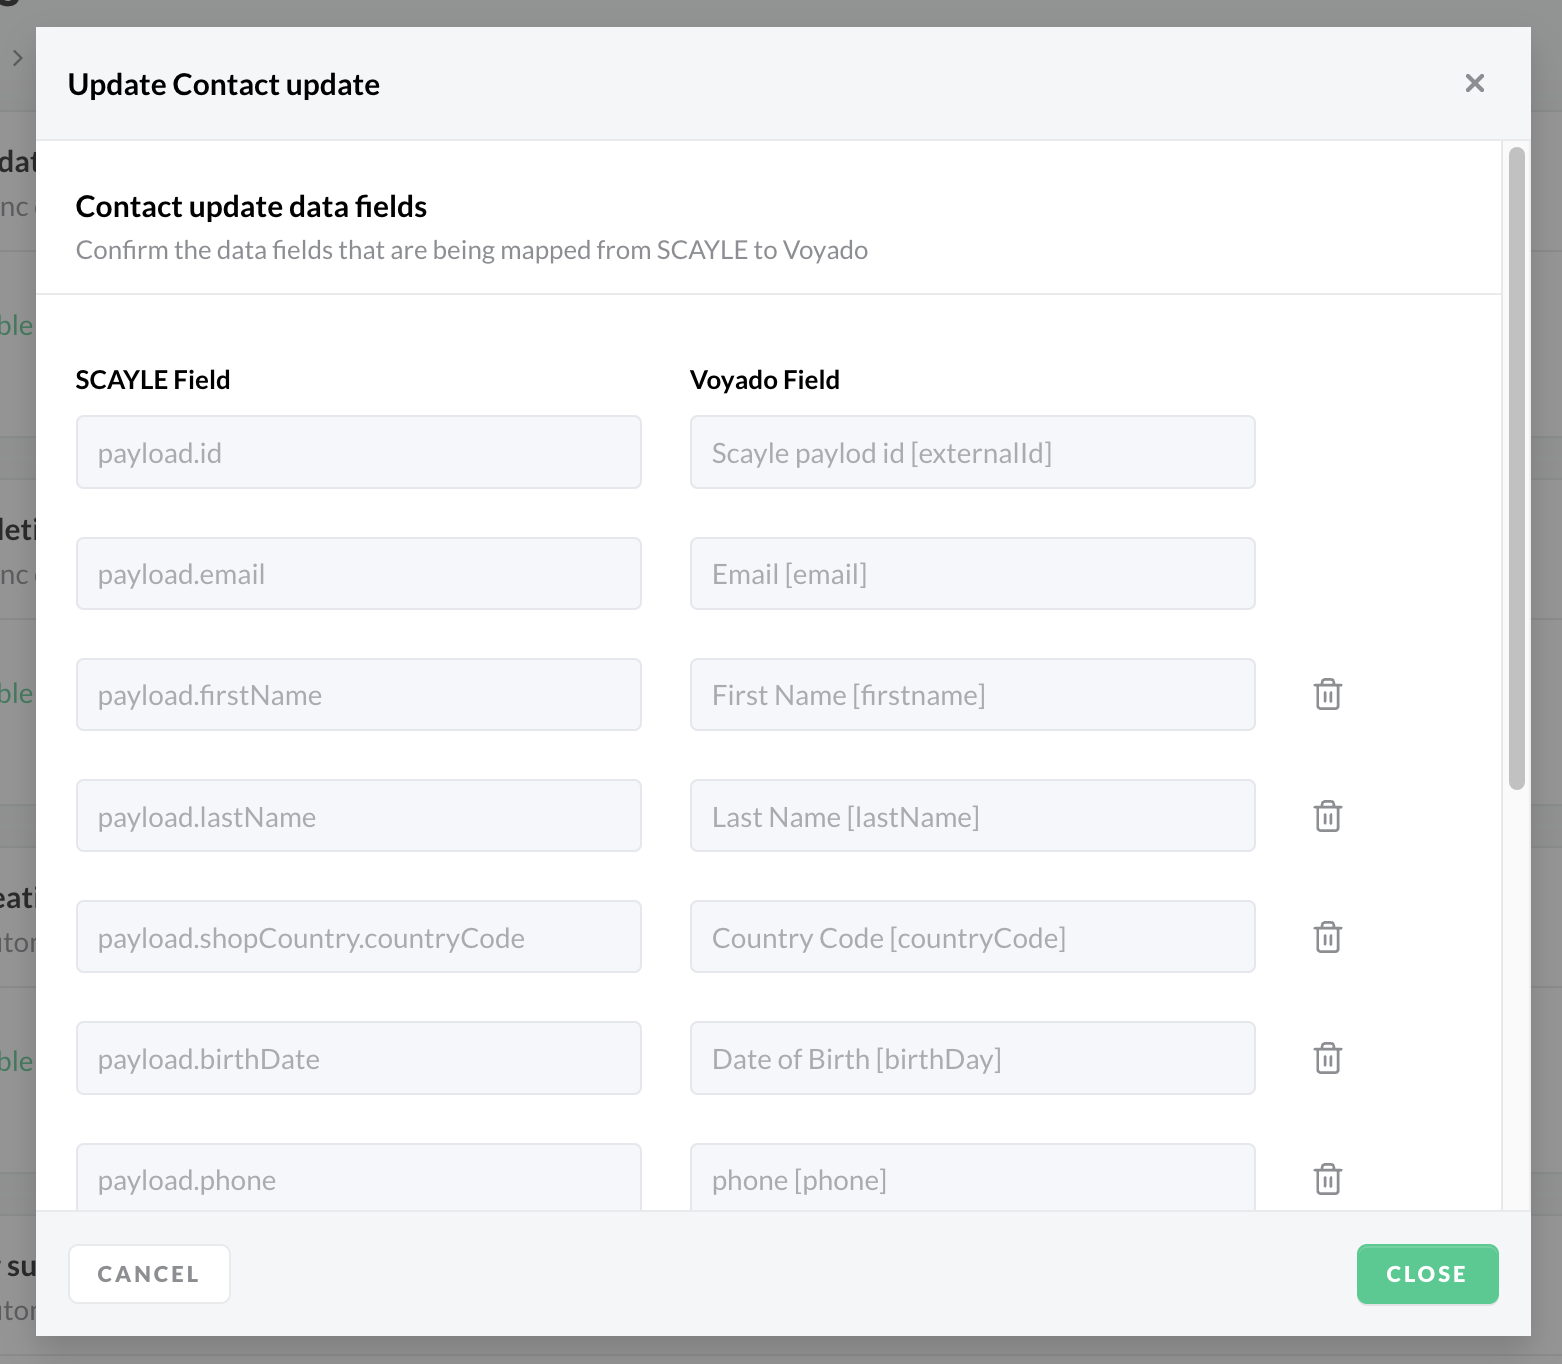
Contact Field Mappings
Configure Newsletter
The Voyado Engage Add-on allows you to handle newsletter subscription updates as the Add-on
- creates your SCAYLE customers in Voyado, if they click the subscription checkbox displayed in the Checkout frontend
- handles the the newsletter subscription check of the Checkout
- creates guest customers (non-registered) in Voyado that signed up in your Storefronts newsletter form
If the double-opt in checkbox is marked the Add-on creates consent events for newsletter and guest newsletter subscriptions in Voyado. These events can be used to build double opt-in automation flows:
- SCAYLE Newsletter: consentScayleNewsletter
- SCAYLE Guest Newsletter: consentScayleGuestNewsletter
Activate newsletter
- Go to
Add-Ons > Voyado Add-On > Contacts. - In the Newsletter section, switch on the newsletter event.
- Click SAVE.
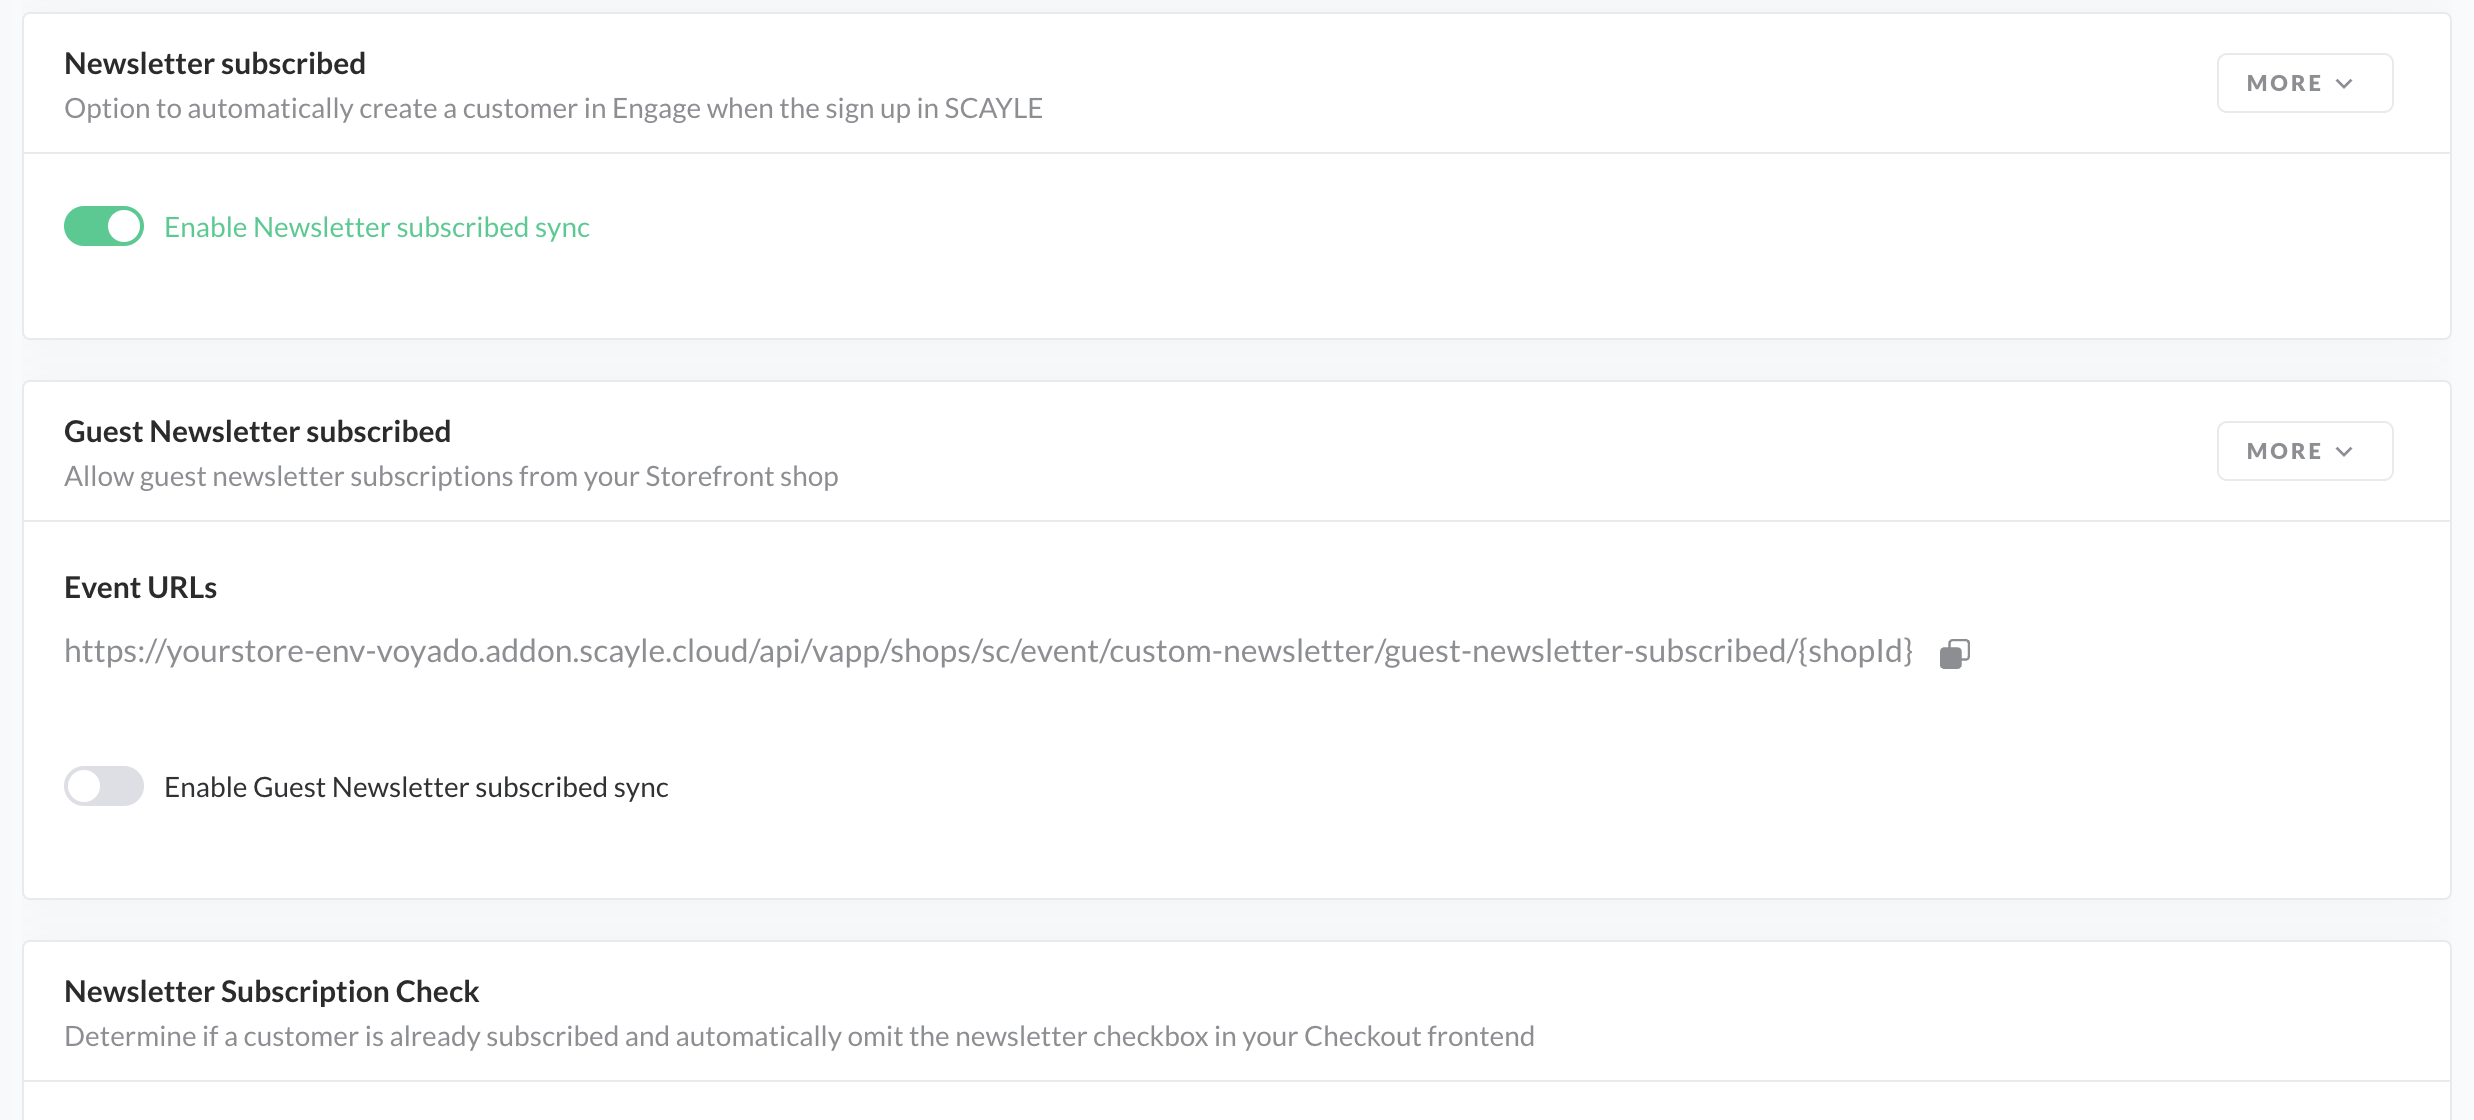
Newsletter Subscription
Newsletter field mappings
For the newsletter most of the field mappings are predefined (SCAYLE system fields are mapped to corresponding Voyado system fields). However, you can optionally remove some of the mappings.
- Go to
Add-Ons > Voyado Add-On > Contacts. - In the Newsletter section, click More.
- Select the Field Mappings from the dropdown options.
- Remove the chosen field (optional).
- Click SAVE.


