

Setting up Single Sign-On (SSO)
SSO allows users to log in to the SCAYLE Panel using a central identity provider (e.g., Entra ID or Google Workspace) without needing separate credentials for the SCAYLE Panel.
Preconditions
- Access to the SCAYLE Panel with administrator privileges
- Access to Microsoft Entra ID or Google Workspace with permissions to create and configure Enterprise or Custom SAML Applications
- Basic understanding of authentication concepts
Technical Overview (Simplified)
SSO with Microsoft Entra ID (Azure AD)
Preamble
To enable SSO, you must create a dedicated Enterprise Application in Entra ID.
In this guide, we refer to this application as the “Entra ID Panel Integration.”
This application will connect Entra ID as the IDP and the SCAYLE Panel as the Service Provider (SP) using the SAML 2.0 protocol.
Microsoft has renamed Azure Active Directory to Microsoft Entra ID. All configuration steps and SAML parameters remain identical. In this documentation, “Microsoft Entra ID” and “Azure AD” are used interchangeably.
Entra ID Configuration
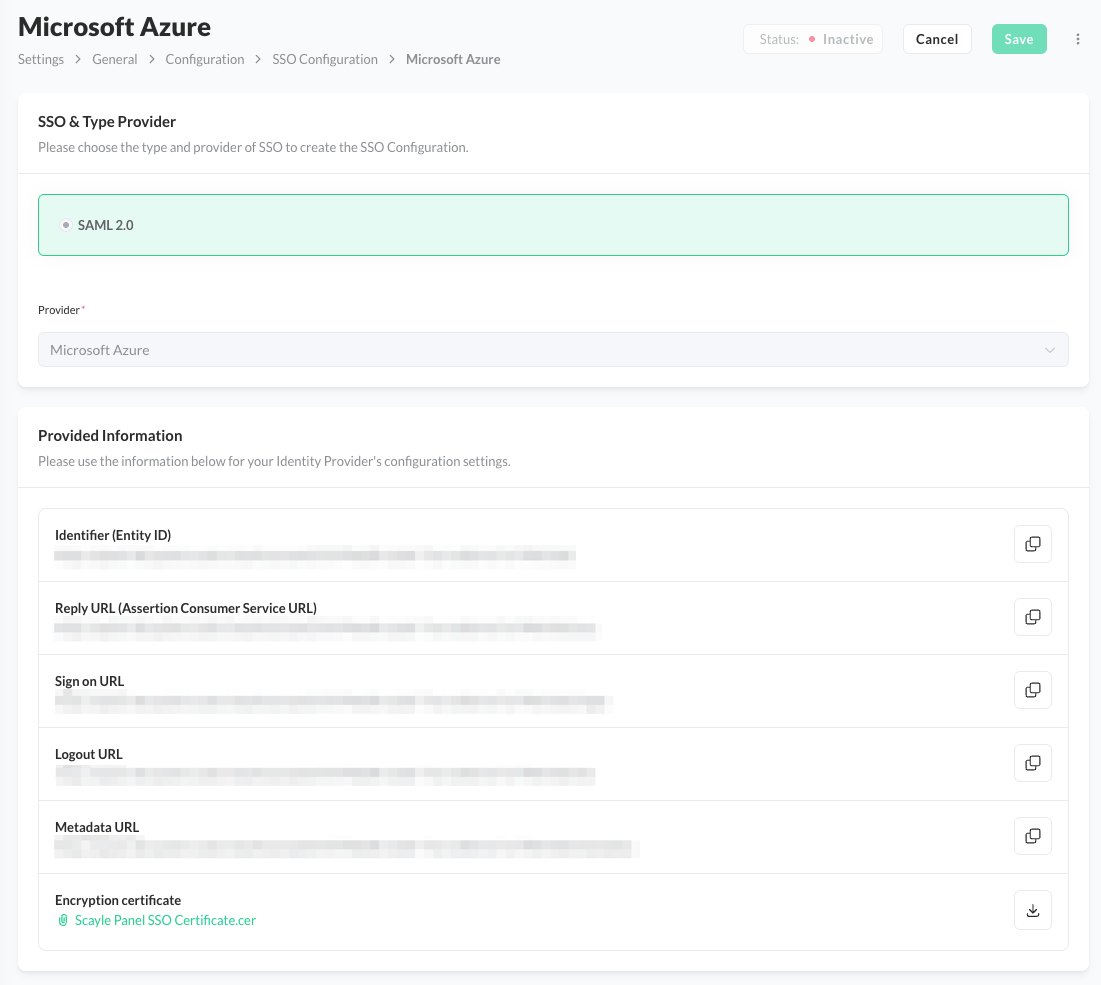
Step 1: Create a Service Provider in the Panel
- In your SCAYLE Panel, navigate to Settings ➜ General ➜ Configurations ➜ SSO Configurations.
- Create a new SAML Service Provider configuration for Entra ID.
- After creating the provider, note down the following values since you’ll need them in Entra ID:
- Entity ID (Identifier)
- Reply URL (Assertion Consumer Service / ACS URL)
- Sign-on URL
- Logout URL
- Relay State (if provided)
- Panel encryption certificate
- Configure Default Company and Default Shop for new users created via this SSO.
- Administrators can later adjust these assignments to fine-tune each user’s access rights as needed.
- Adjusted permissions made by administrators are not overwritten after initial user creation.
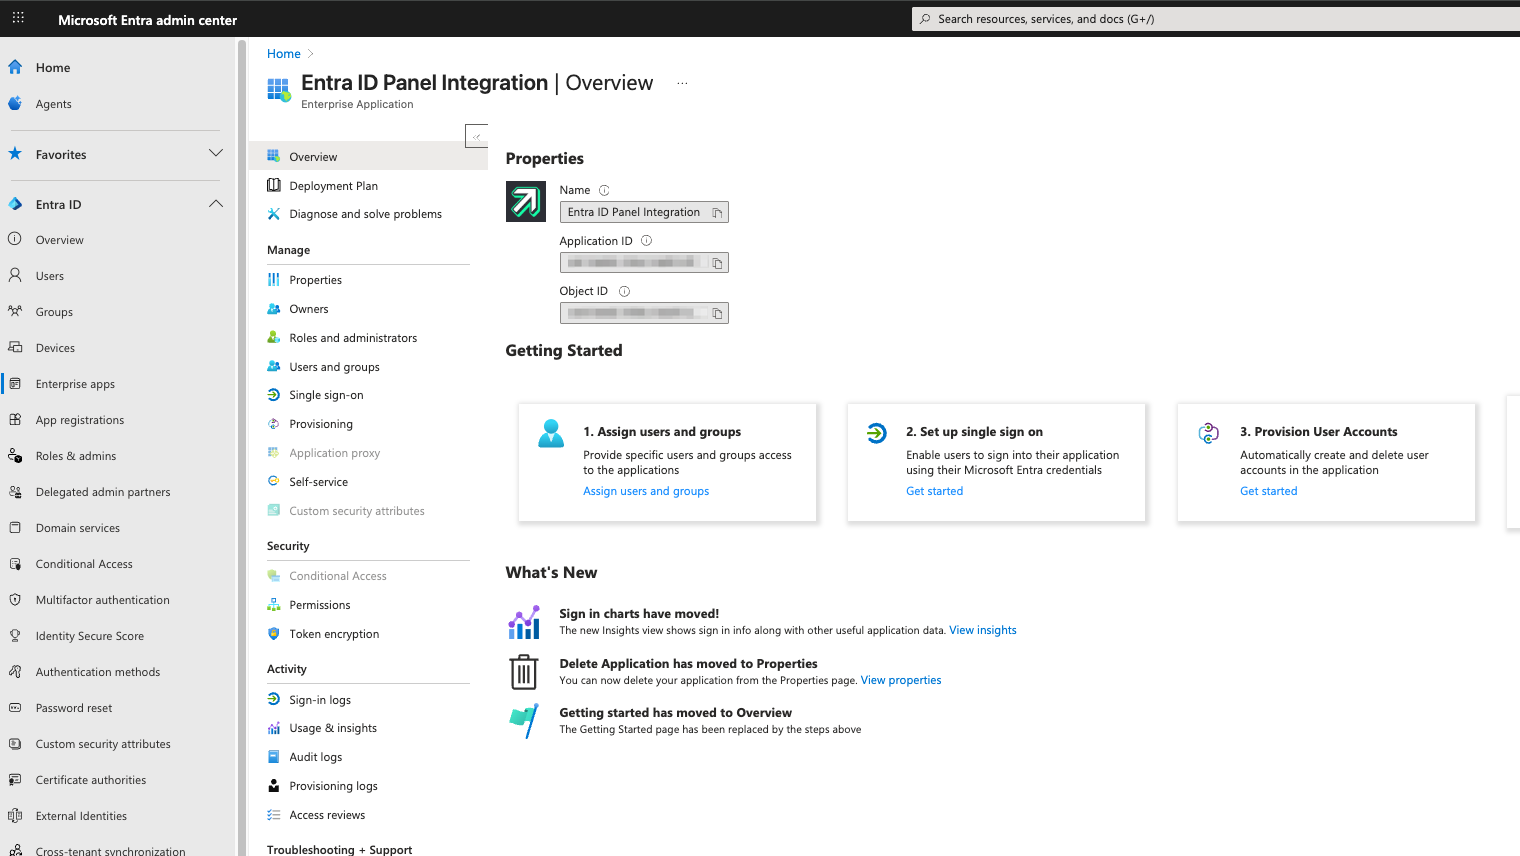
Step 2: Create the Entra ID Application
- Log in to your Microsoft Entra Admin Center.
- Go to Entra Admin Center ➜ Enterprise Applications ➜ + New application
- Select Create your own application e.g. Entra ID Panel Integration.
- Optionally add a SCAYLE logo or description; these fields have no effect on SCAYLE Panel configuration.
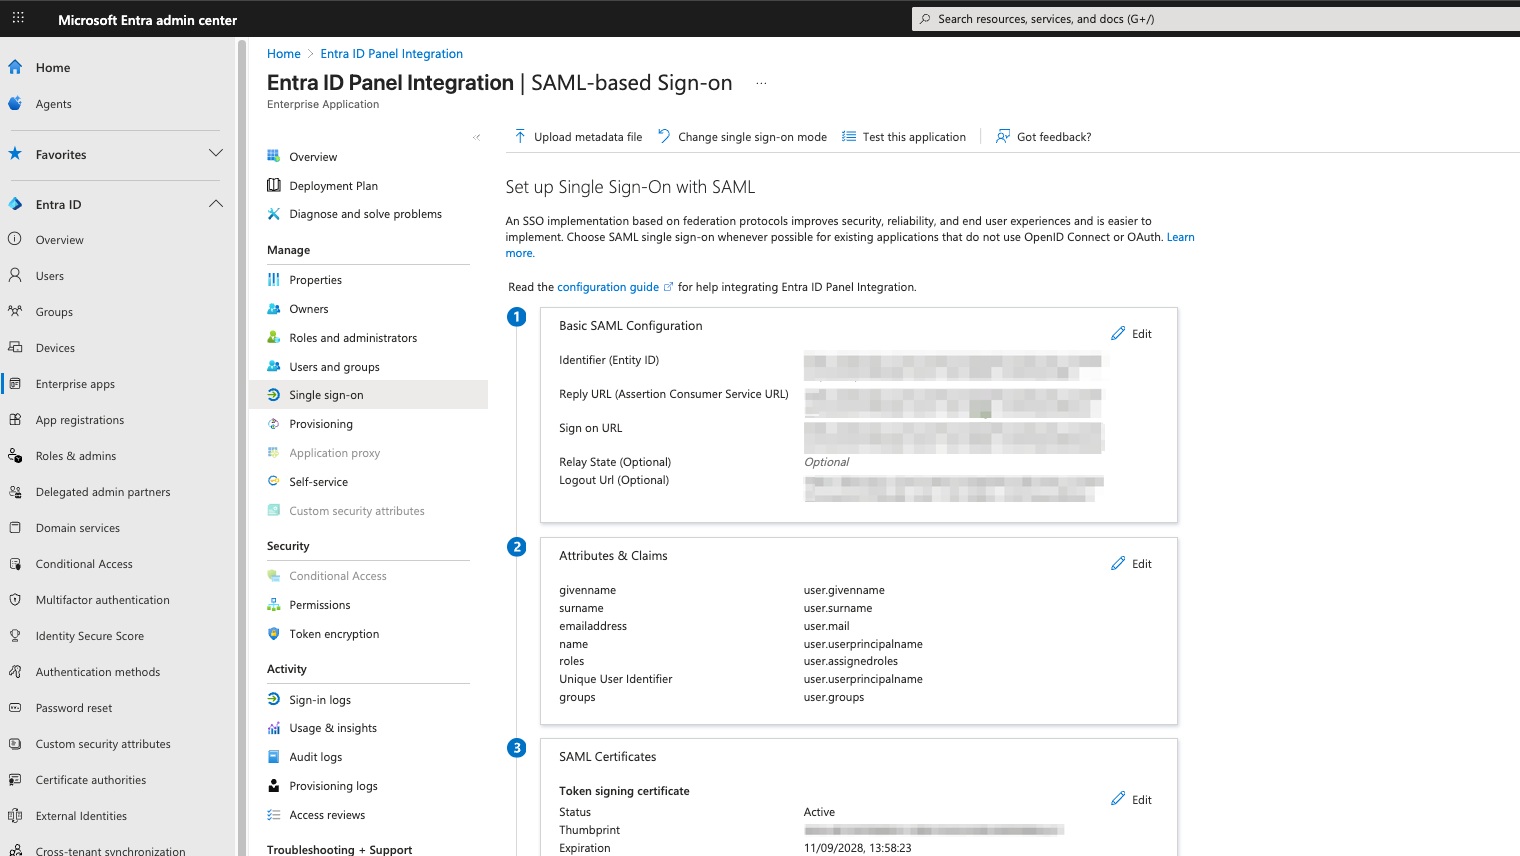
Step 3: Configure SAML-based Single Sign-On
- In your new application “Entra ID Panel Integration”, open Single Sign-On ➜ SAML.
- Under Basic SAML Configuration, fill in the following fields with the values from your SCAYLE Panel’s Service Provider:
- Identifier (Entity ID)
- Reply URL (ACS)
- Sign-on URL
- Relay State (optional)
Tip: All these values are available in your SCAYLE Panel under the created Service Provider configuration
Step 4: Configure Attributes & Claims
- Go to the Attributes & Claims section.
- Make sure at least the following attributes are provided:
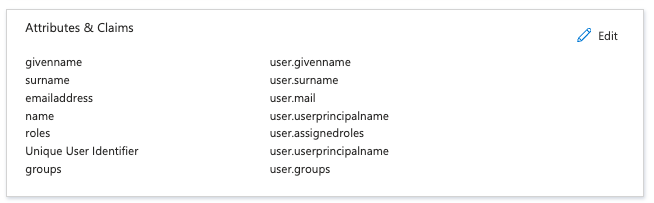
The following table shows the claims and their respective source attributes and the required formatting:
| Claim Name | Source Attribute | Name identifier format |
|---|---|---|
| nameidentifier | user.userprincipalname | Email address |
| emailaddress | user.mail | Omitted (default) |
| givenname | user.givenname | Omitted (default) |
| surname | user.surname | Omitted (default) |
| roles | user.assignedroles | Omitted (default) |
Step 5: Configure the SAML Signing Certificate
- In SAML Certificates, create a new certificate pair.
- Download one of the certificates (Base64 format recommended).
- Upload the certificate to your Scayle Panel under the respective Service Provider.
- Ensure the following options are configured in Entra ID:
- Signing Options: Sign SAML response and assertion
- Signing Algorithm: SHA-256
Step 6: Configure SSO URLs
- In the section Set up “Entra ID Panel Integration”, copy the following values:
- Azure AD Identifier (Issuer)
- Login URL
- Logout URL
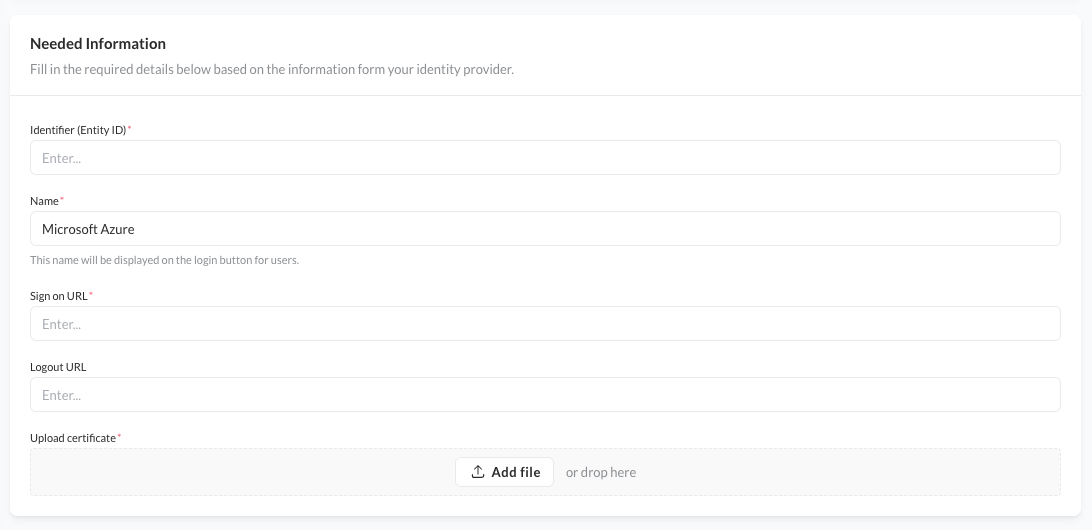
- Paste these into the Identity Provider configuration fields in your SCAYLE Panel.
- Azure AD Identifier (Issuer) into Identifier (Entity ID)
- Login URL into Sign on URL
- Logout URL into Logout URL
Step 7: Configure Token Encryption
- Under Token Encryption, import the Panel certificate (available in the SCAYLE Panel Service Provider configuration).
- This ensures that SAML responses from Entra ID are encrypted and secure.

General
Logout Users
In Entra ID, there are two ways to log out a user:
- From the Identity Provider (Entra ID):
When a user logs out from Entra ID, a SAML Single Logout (SLO) request is sent, which also terminates the user’s session in the SCAYLE Panel. - From the SCAYLE Panel:
When a user logs out directly from the SCAYLE Panel, the SAML logout flow is triggered, logging the user out from Entra ID as well.
This ensures a consistent logout experience and session termination on both sides.
Assign Users and Groups
- In the Entra ID Application, navigate to Users and Groups.
- Click Add user/group.
- Select users or groups who should have access to the Panel.
- Assign the appropriate role on the right-hand side.
Create Custom Roles
- Navigate to your Entra Admin Center ➜ App registrations ➜ Entra ID Panel Integration. Open App roles ➜ + Create app role.
- Define roles that can later be mapped in the Panel:
- Display name: e.g., Administrator
- Allowed member types: Both
- Value: internal role name (available via Panel Role Overview ➜ Export CSV)
- Internal names follow these rules:
- lowercase only
- underscores instead of spaces
no special characters or umlauts
SSO with Google
This section describes how to configure Google Workspace as an Identity Provider (IDP) for the Panel using the SAML 2.0 protocol.
The goal is to enable users to sign in to the SCAYLE Panel using their Google Workspace credentials.
Before you begin, ensure you have:
- Super Administrator access to Google Workspace with rights to create and manage Custom SAML Apps.
- Access to the Panel administration with rights to create and configure Service Providers.
We refer to the application created in Google Workspace is referred to as the “Google Panel Integration.”
Google Configuration
Step 1: Create a Service Provider in the SCAYLE Panel
- Log in to the SCAYLE Panel administration.
- Navigate to Service Providers and select Create New.
- Choose SAML as the protocol type.
- Enter the following information:
- Entity ID (SP Entity ID)
- Assertion Consumer Service (ACS) URL
- Configure a Default Company and Default Shop for new users created via this SSO.
- Administrators can later adjust these assignments to fine-tune each user’s access rights as needed.
- Adjusted permissions made by administrators are not overwritten after initial user creation.
Leave the configuration window open since you will need these values when setting up Google.
Step 2: Create the Google Workspace SAML Application
- Log in to the Google Admin Console (https://admin.google.com) using an administrator account.
Go to: Apps ➜ Web and mobile apps ➜ Add App ➜ Add custom SAML app - Enter the following information:
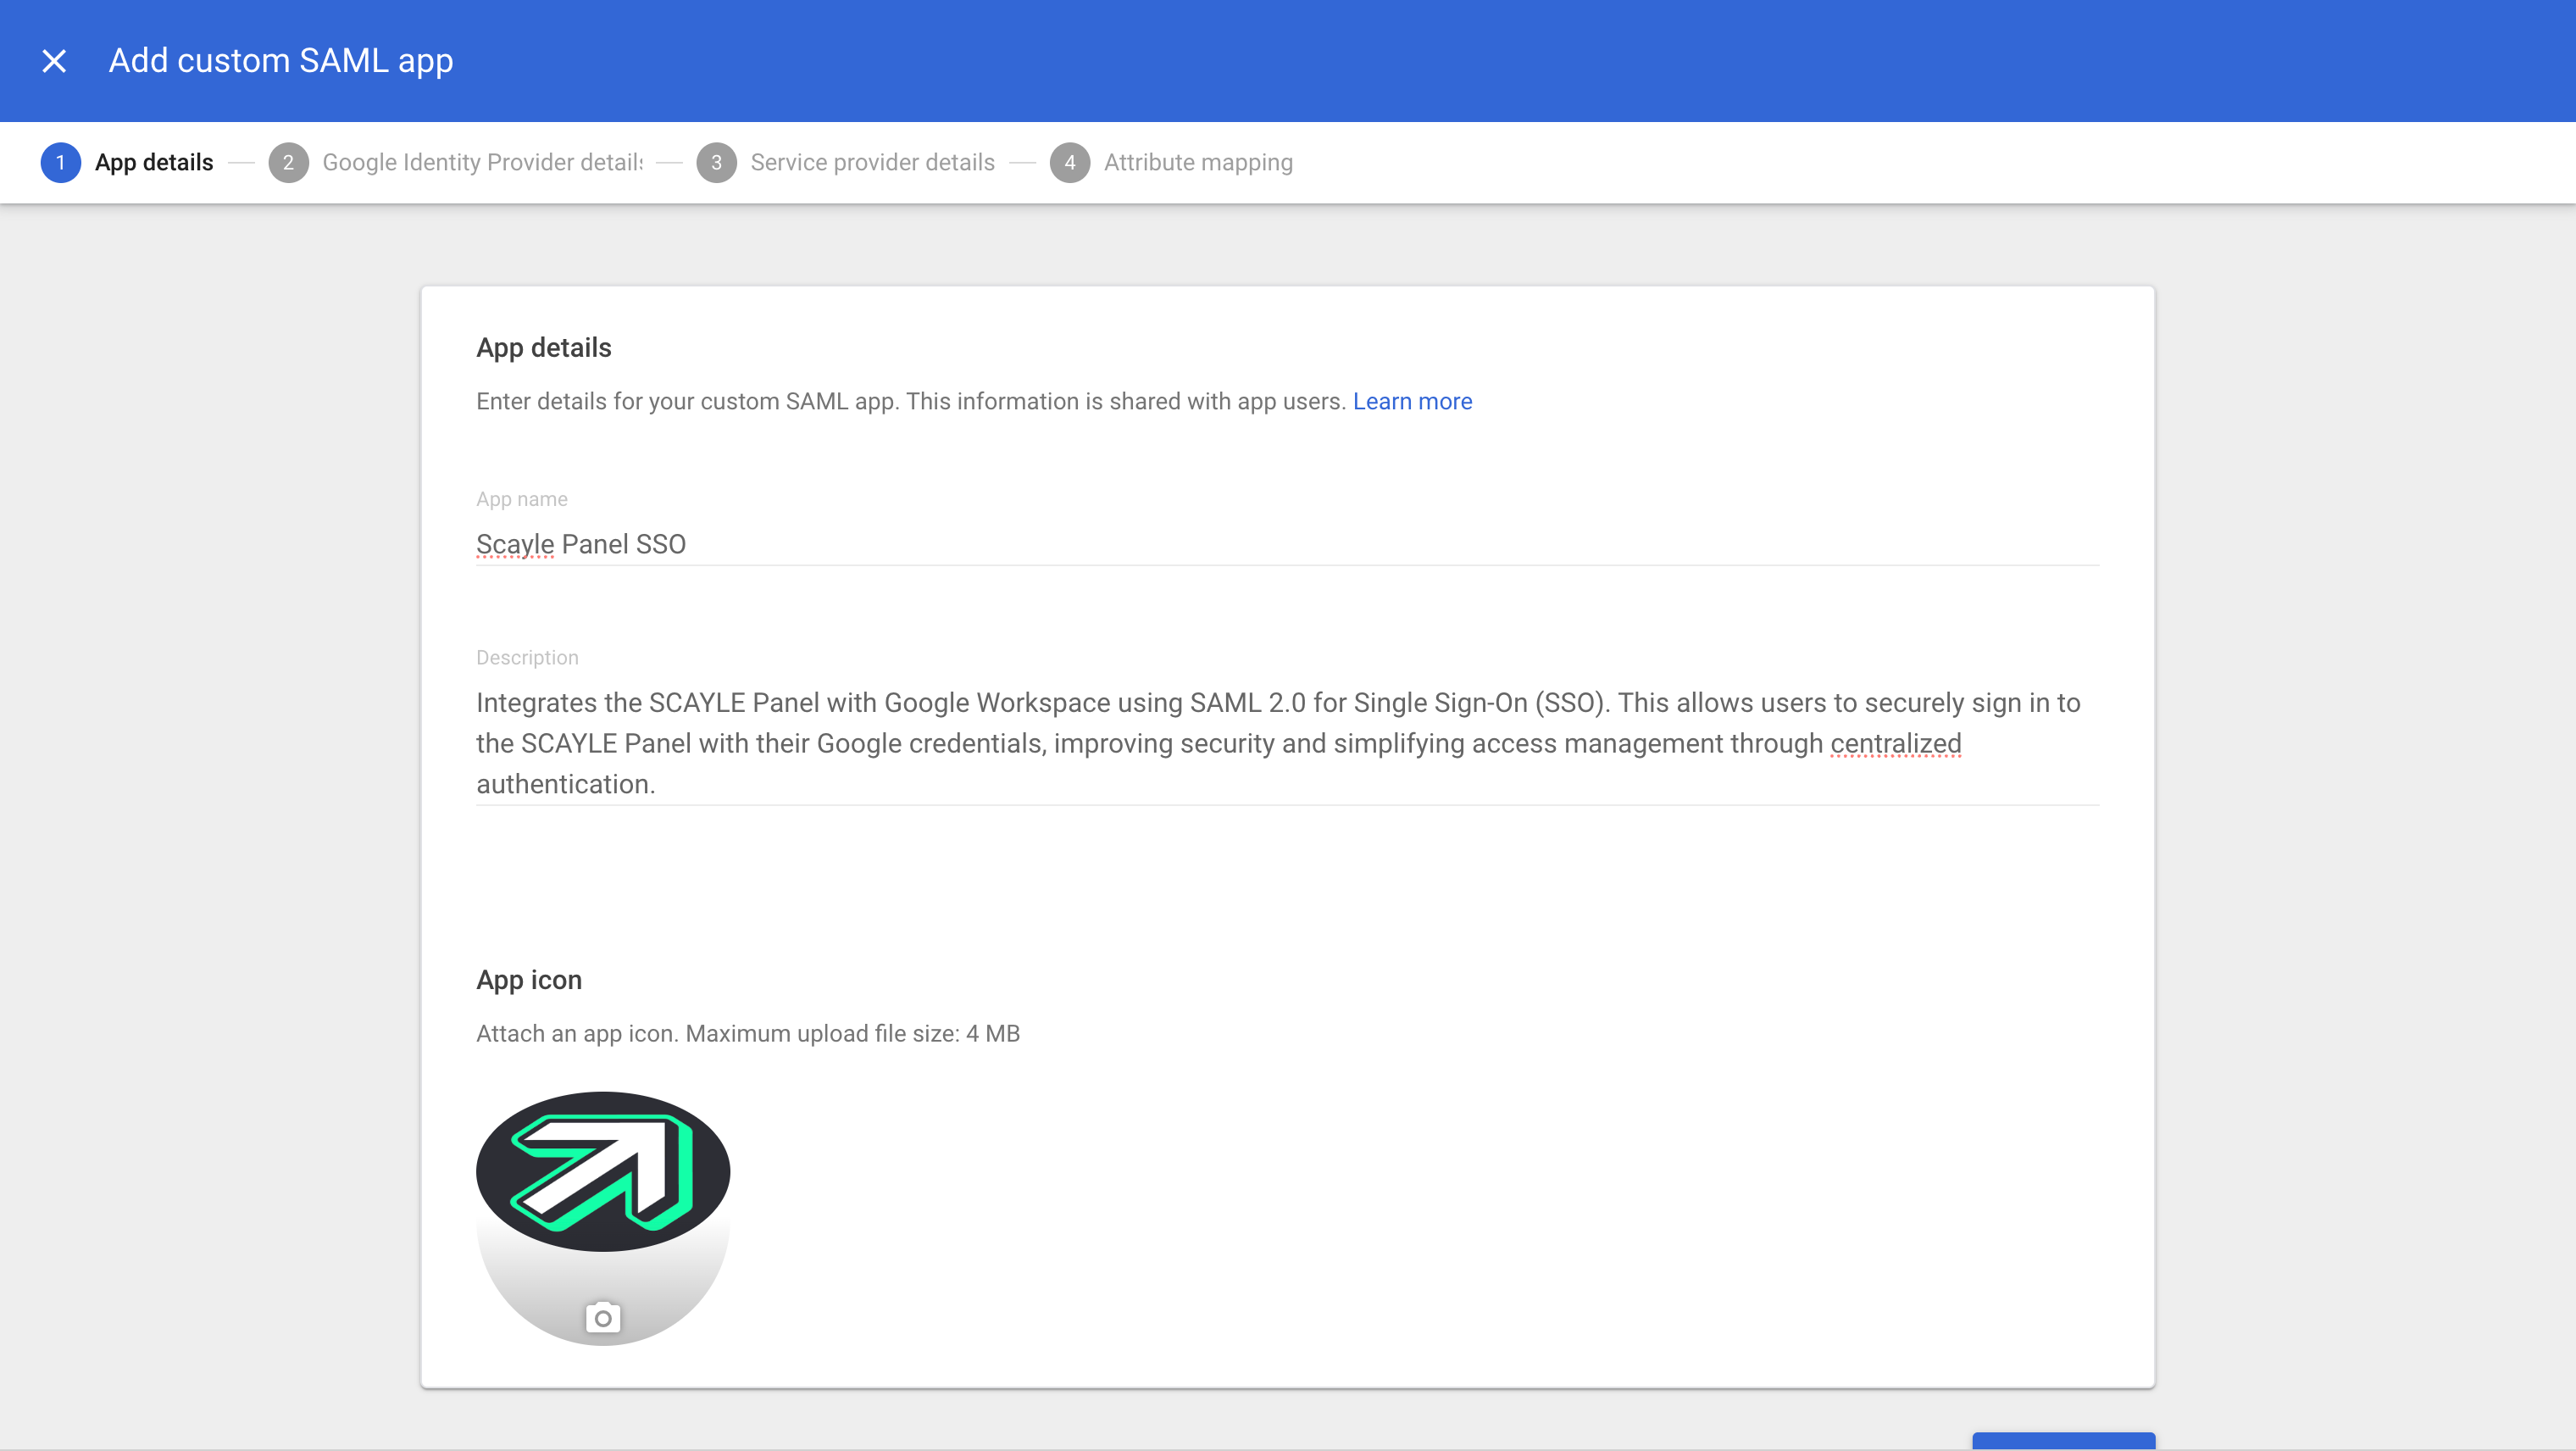
- App Name: “Google Panel Integration”
- (Optional) Upload your SCAYLE logo for easy identification.
- Click Continue.

Step 3: Configure Google Identity Provider Details
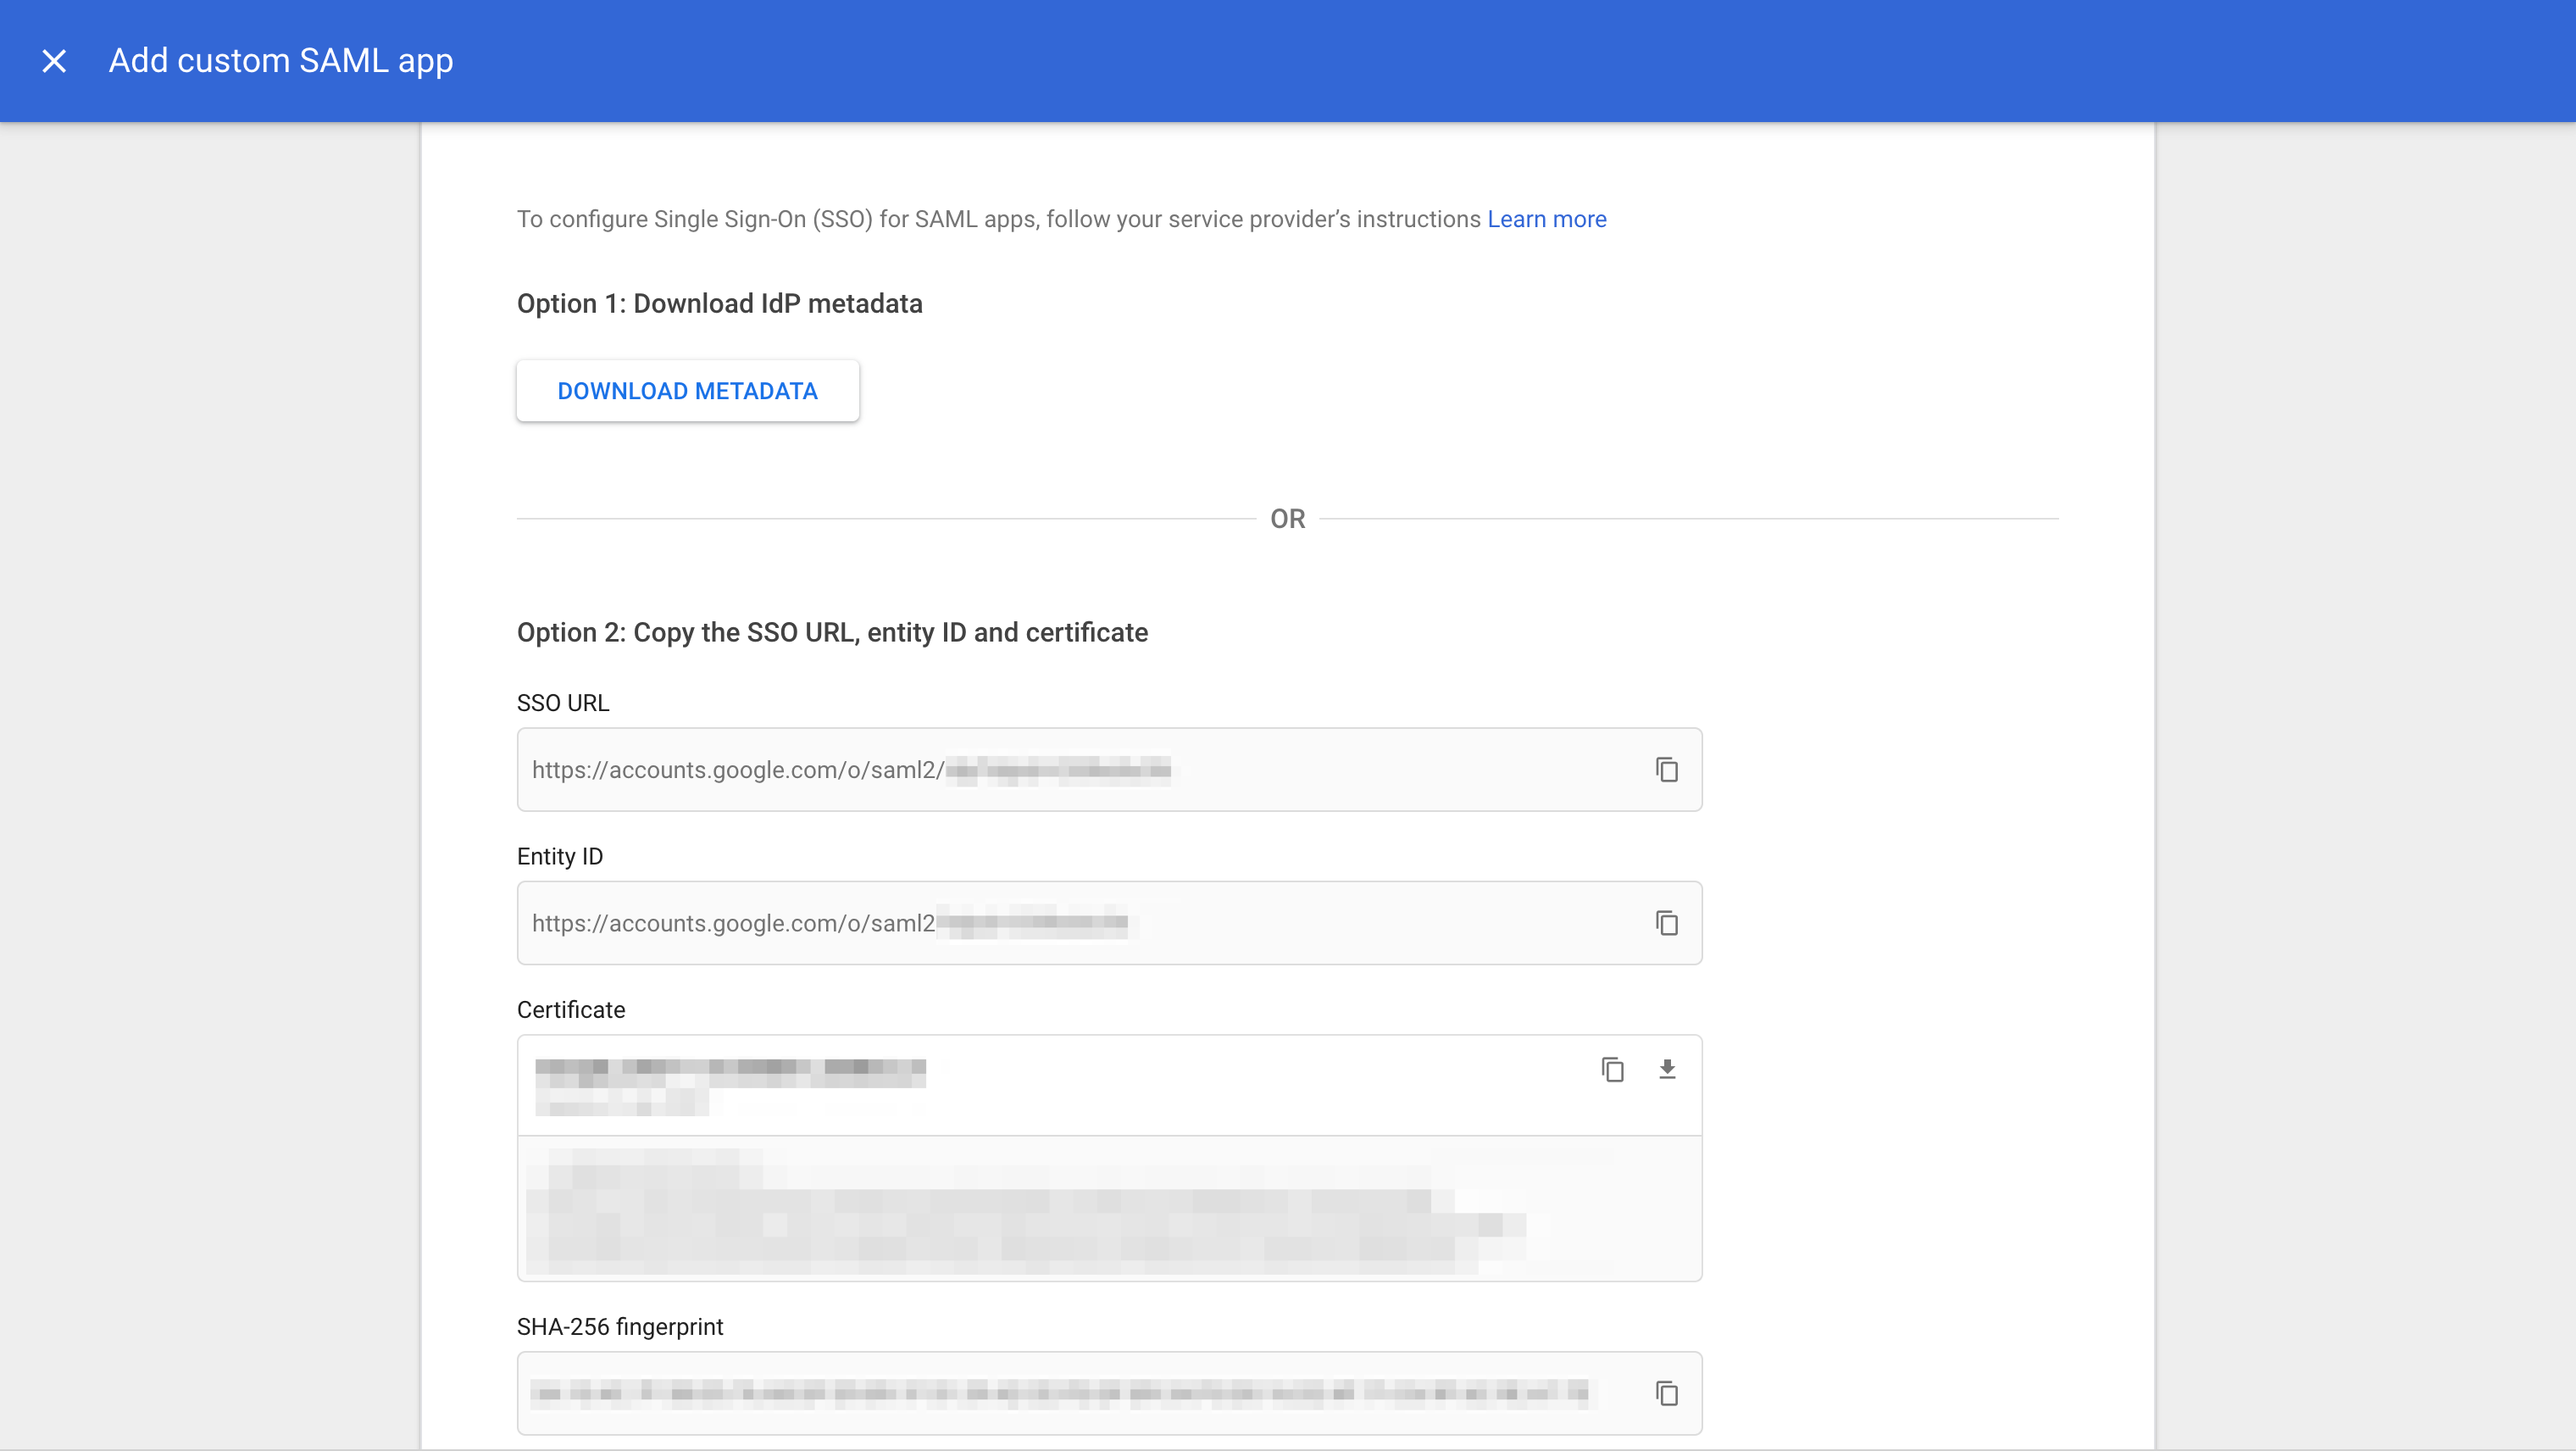
On the Google Identity Provider details screen, download or copy the following data:
- SSO URL (Google SAML endpoint)
- Entity ID (Google IDP Identifier)
- Certificate
You will later need to enter these values in the Panel under the corresponding Service Provider settings.
Click Continue to proceed to the next step.
Step 4: Configure the Service Provider Details
In this step, define how Google connects to the Panel.
.png)
- Fill in the following values (from the SCAYLE Panel):
- ACS URL: The Assertion Consumer Service URL from the SCAYLE Panel.
- Entity ID: The SP Entity ID from the SCAYLE Panel.
- Start Url The Start URL from SCAYLE Panel
- Signed Response must be enabled.
- Select TRANSIENT for Name ID format
Click Continue to proceed to the next step.
Step 5: Configure Attributes Mapping
Attributes define how user data in Google Directory is passed to the SCAYLE Panel.
Check the section "How to create Custom Attributes in Google" on how to add the custom mappings required for the next step.
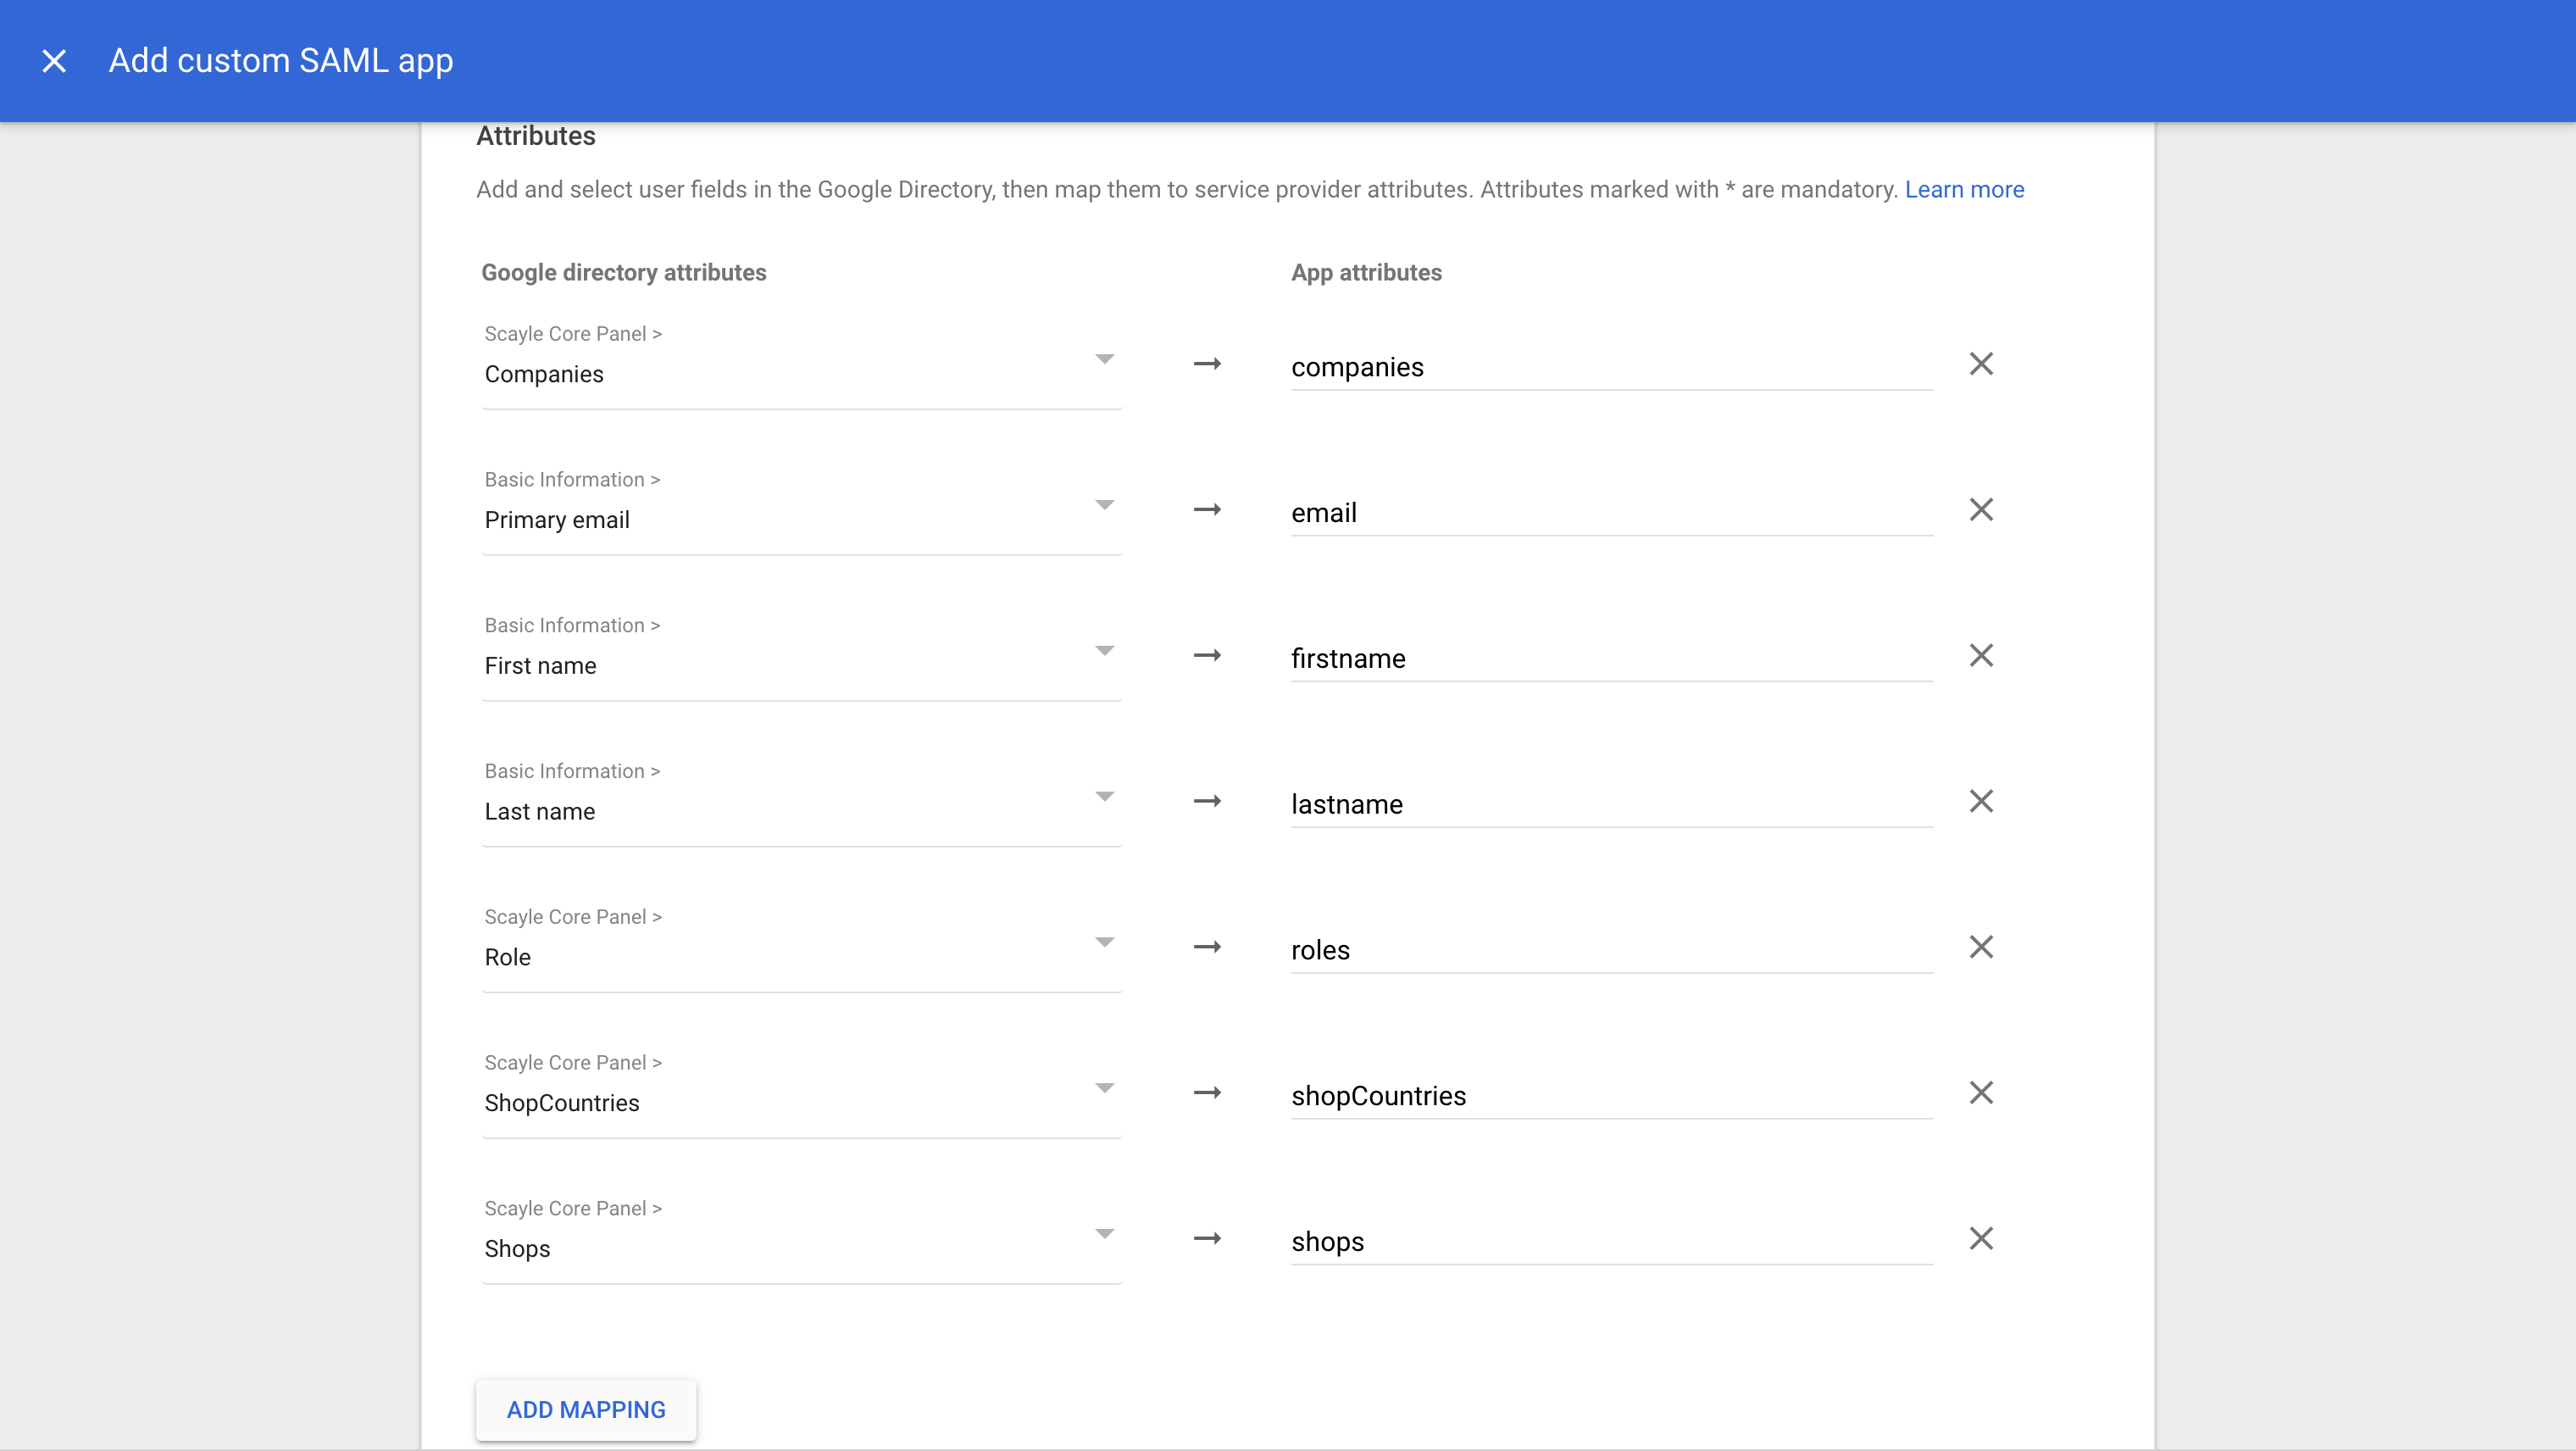
- Under Attribute Mapping, add the following fields:
| Google Directory Attribute | App Attribute (SCAYLE Panel) | Description |
|---|---|---|
| Primary Email | User email address | |
| First Name | firstname | User’s first name |
| Last Name | lastname | User’s last name |
| Companies | companies | The company id's |
| Role | roles | The roles internal names |
| ShopCountries | shopCountries | The Shop Country id's |
| Shops | shops | The Shop id's |
- Click Finish when all mappings are set.
- Leave Group membership empty
Step 6: Enable and Assign the Application
Once the SAML app has been created:
- Open the new Google Panel Integration application in Google Admin Console.
- Click User Access.
- Enable the app for everyone or specific organizational units (groups).
This ensures that only authorized users can sign in to the Panel using SSO.
General
How to create Custom Attributes in Google
- Open https://admin.google.com
- Navigate to Directory ➜ Users
- Open "More options" within the select on the top right corner.
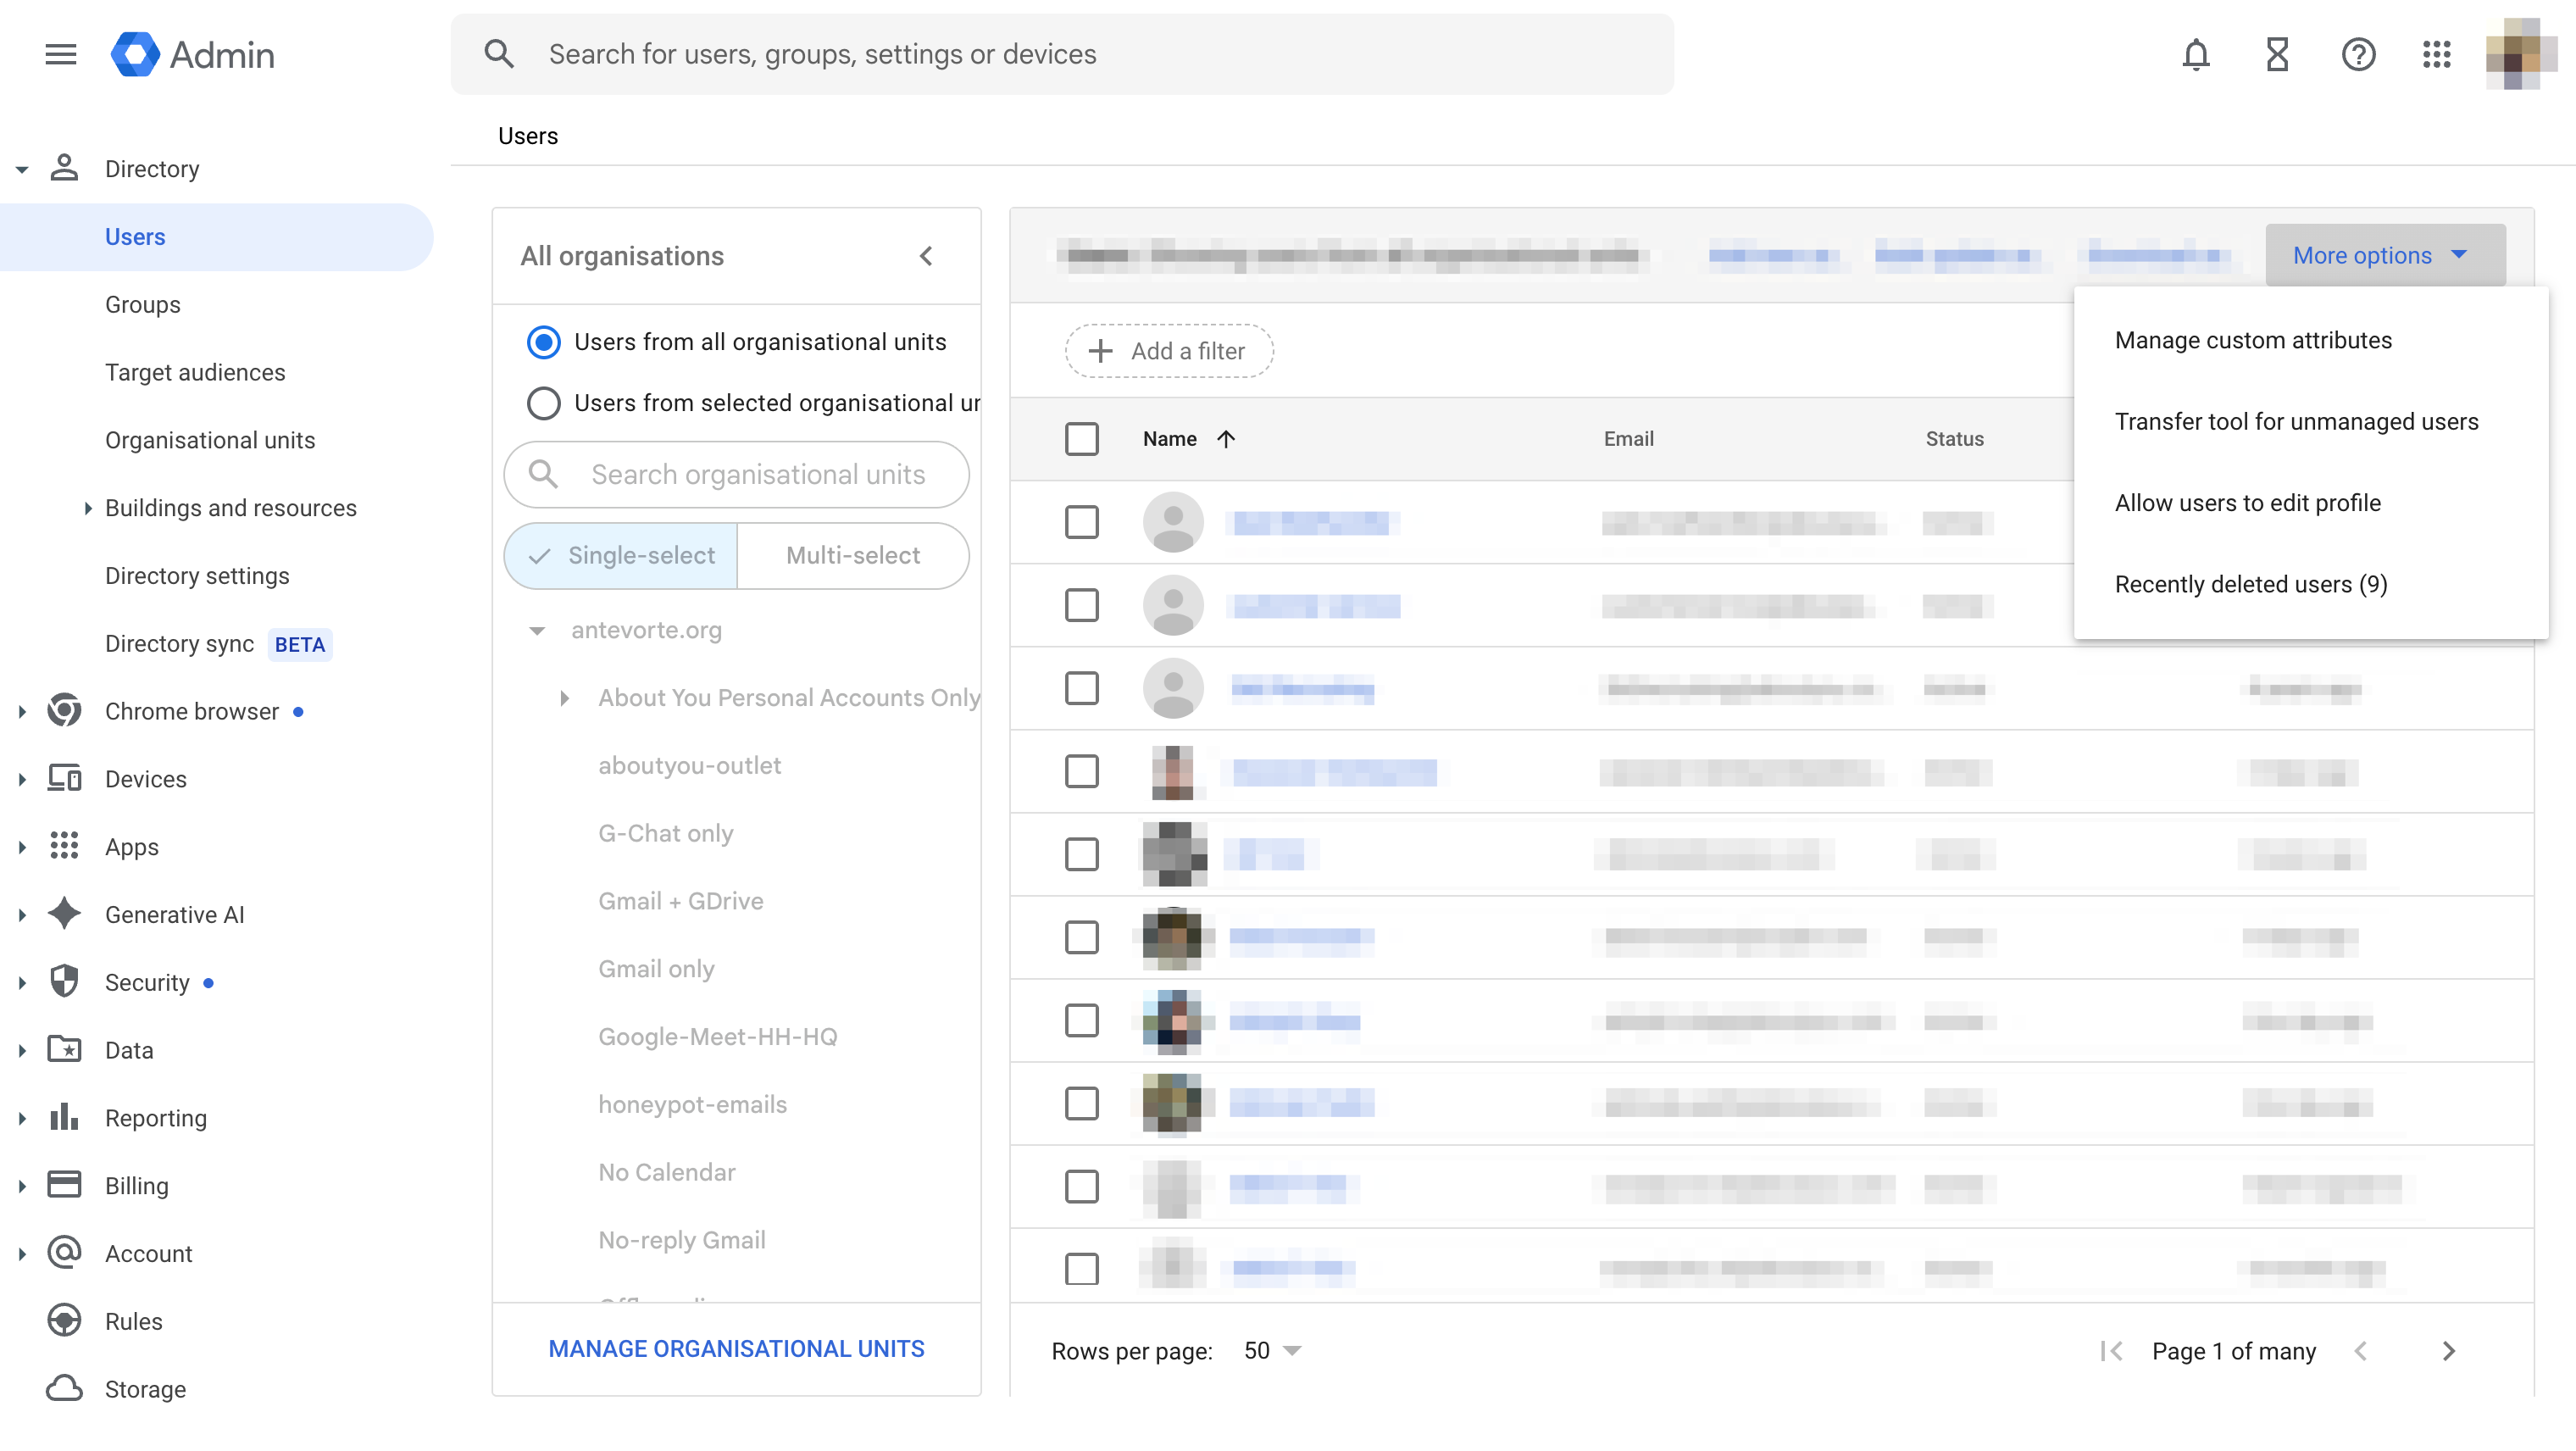
- Fill out the following fields
- Category - SCAYLE Panel
- Description
- Add the following Custom fields
| Name | Info Type | Visibility | No. of values |
|---|---|---|---|
| Companies | Text | Visible to users | Multi-value |
| Role | Text | Visible to users | Multi-value |
| ShopCountries | Text | Visible to users | Multi-value |
| Shops | Text | Visible to users | Multi-value |
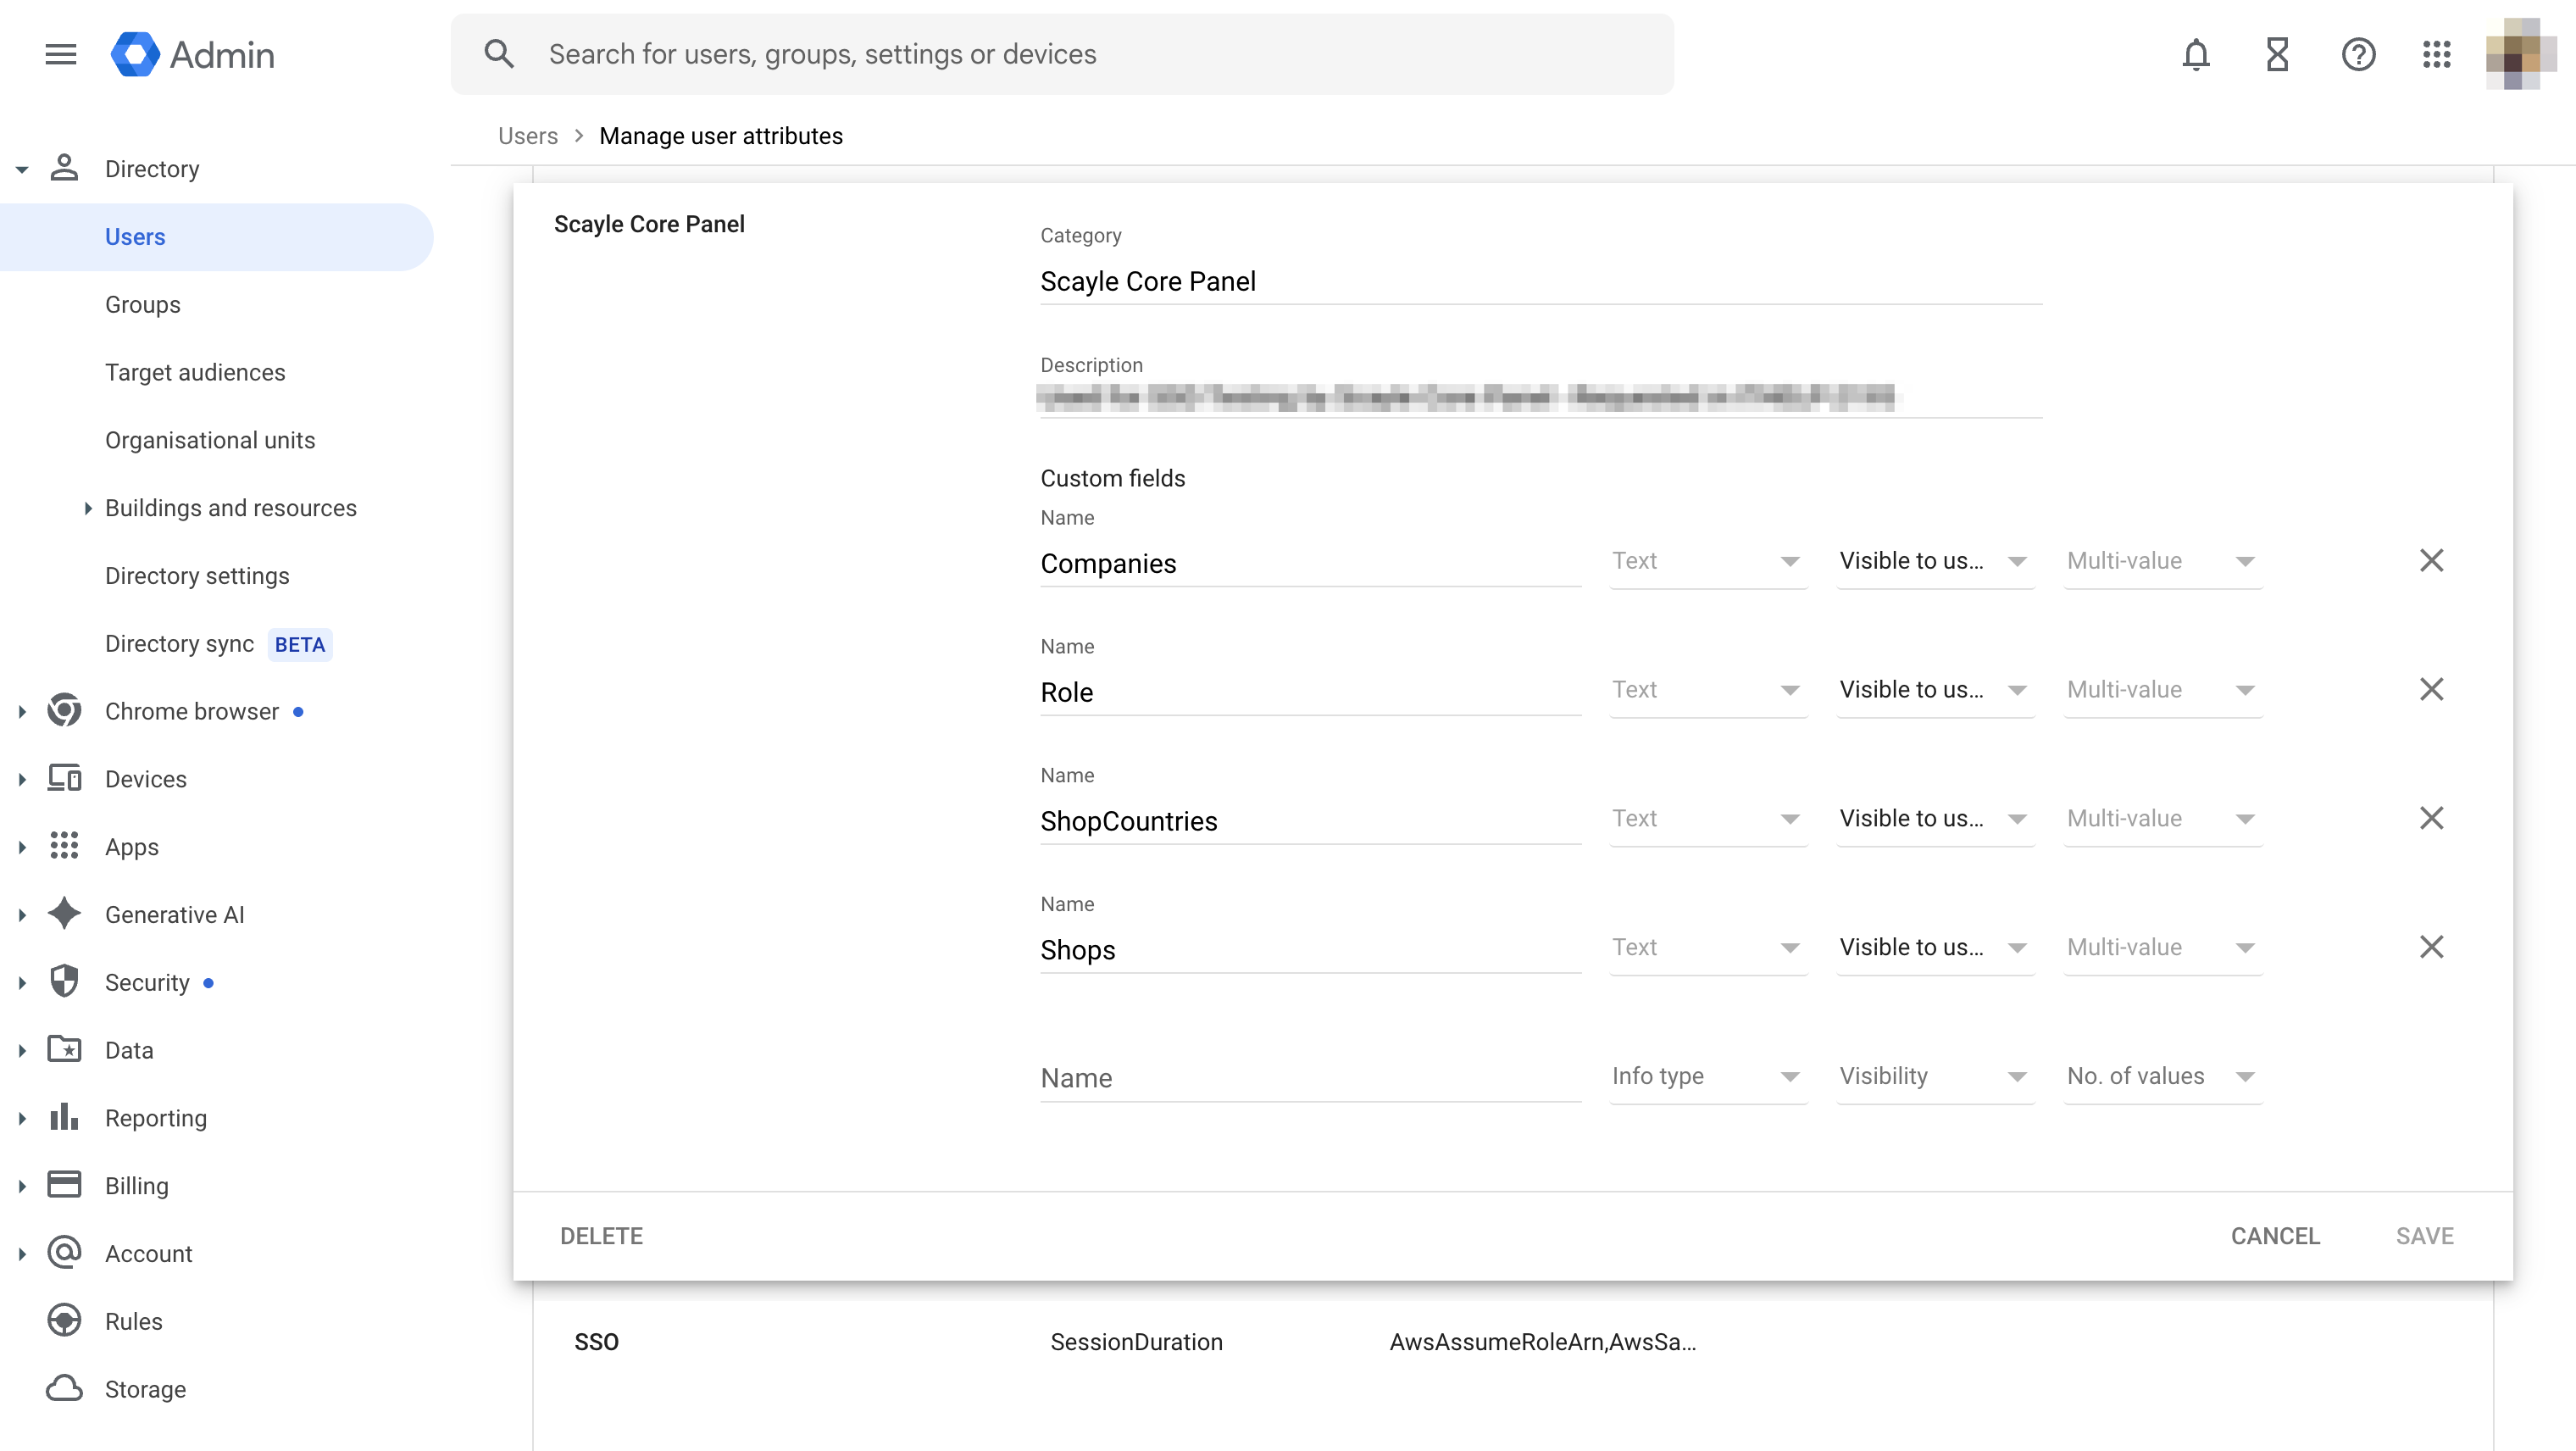
Save the changes.
Logout Users (SLO)
Google Identity does not support Single Logout (SLO) via the SAML protocol.
As a result, when a user logs out from the SCAYLE Panel, their session with Google remains active, and they are not automatically signed out of their Google account.
Frequently Ask Questions
User Defaults During Service Provider Creation
When creating a service provider, administrators can define default settings for new users. These defaults determine which companies and shops a user can access after a successful login.
Setting these defaults is mandatory, ensuring that new users do not automatically gain access to all shops and companies within the system.
Administrators can later adjust these assignments to fine-tune each user’s access rights as needed. The adjustments made by administrators are not overwritten by the default settings, as these defaults are applied only once during the initial creation of an SSO user after their first successful login.
Example: If the user defaults are set to Shop 1001 and Company 1000, the first time the user signs in, their account is created in the Panel with these access permissions automatically applied.
How does a User flow works in the panel
Users identification
To provide a seamless and secure Single Sign-On (SSO) experience, our user identification strategy prioritizes the unique identifier provided by the Identity Provider (IdP). This ensures that users can always log in, even if their email address changes at the IdP, and protects against account takeover scenarios.
The Core Principle: NameID is the Source of Truth
While users are unique by email within our application, for SSO logins, the primary identifier will be the persistent SAML NameID provided by the Identity Provider.
- Upon a user's first SSO login, we will store this NameID and associate it with their local user account and the specific SSO configuration they are using.
- On all subsequent logins, we will use this stored NameID to find and authenticate the user.
We will not automatically update a user's email address in our application if it changes at the Identity Provider. The email on our side will be retained until manually changed by an administrator.
Handling Email Address Changes
If a user’s email address changes in the Identity Provider (IdP), it is not automatically updated in the SCAYLE Panel. The existing email address in our system remains unchanged until it is manually updated by an administrator.
Session duration and timeout
The session duration is primarily managed by the Identity Provider (IdP). Each IdP handles session lifetime differently, and some may not support configuring it.
In the SCAYLE Panel, user sessions last 24 hours by default. Fifteen minutes before expiration, a notification banner appears, allowing users to extend their session if needed. If the user chooses not to extend it, only the Panel session will expire and the IdP session remains active.
To synchronize the Panel session duration with the IdP session, the IdP must include the SessionNotOnOrAfter attribute in the ACS (Assertion Consumer Service) response.
Multi-Factor Authentication (MFA) Handling
Both the SCAYLE Panel and the Identity Provider (IdP) can enforce Multi-Factor Authentication (MFA).
To ensure a seamless user experience, users who sign in via SSO will only be prompted for MFA by the IdP.
In this case, the Panel’s built-in MFA will not be enforced.\

