

Domains
Overview
In Storefront Hosting, domains are the web addresses that connect directly to your deployed Storefront Application. While a pre-generated SCAYLE domain is provided after the successful repository setup, our platform also offers intuitive tools for easy management and creation of custom domains, streamlining how users access and interact with your e-commerce store. A custom domain is a unique, personalized web address that you own and use for your e-commerce application, instead of a default address provided by us.
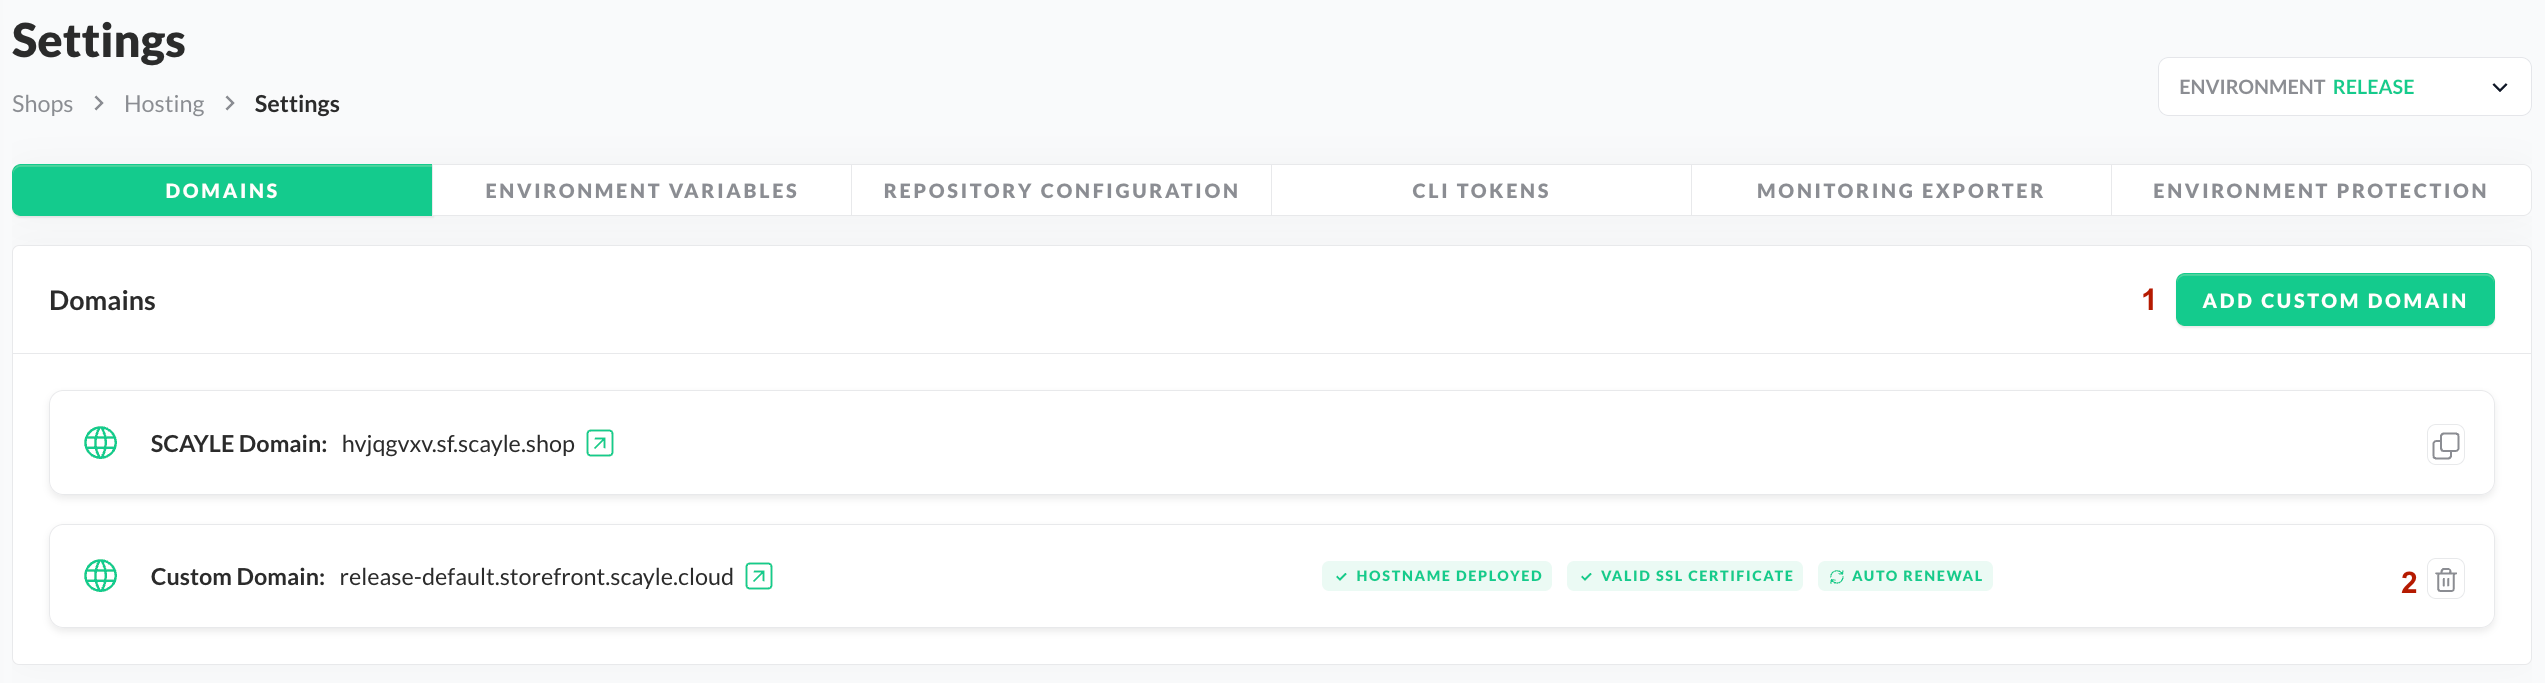
The "Domains" section, located within "Settings," acts as your primary tool for domain management. It provides core functionalities, allowing you to create (1) and remove (2) custom domains, specific to each environment.
Domains
Create a Custom Domain
If you wish to create a custom domain for your application, simply click the "Add Custom Domain" button to be guided through the creation process.
Creating a Custom Domain
Each step in the creation process is dependent on the previous one, meaning you can only move to Step 2 once you've completed Step 1.
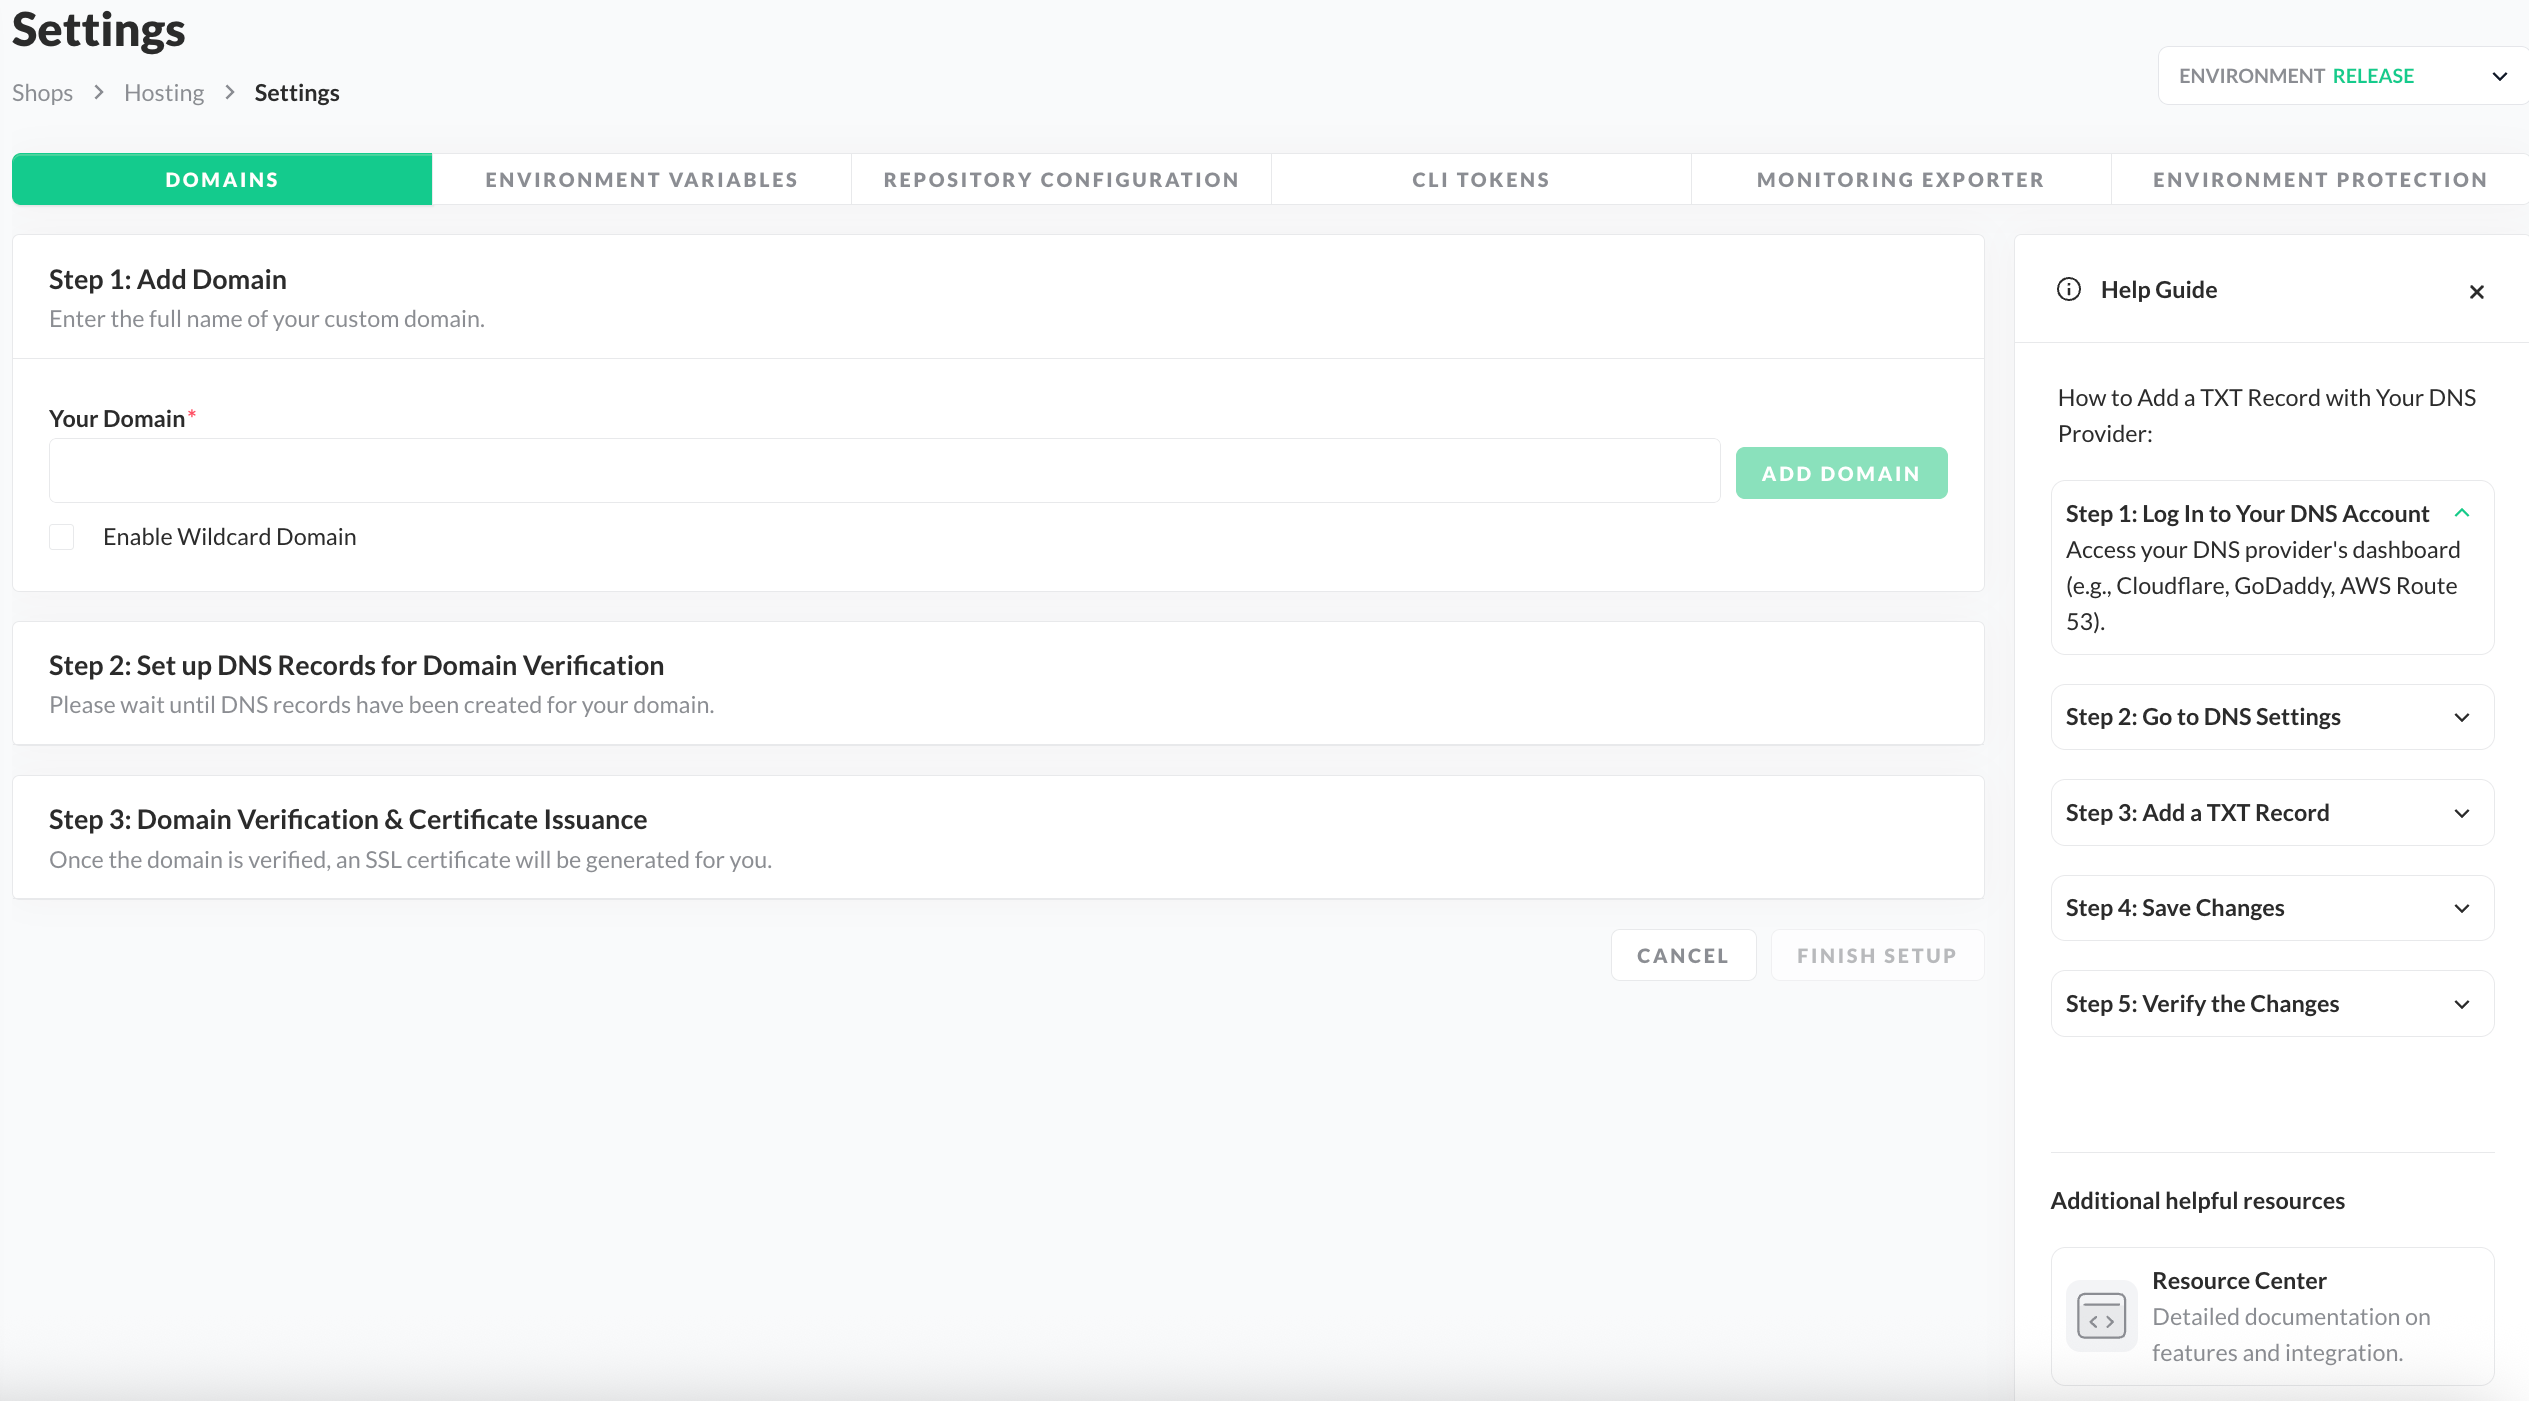
Step 1: Add Domain
- For the first step, you'll need to enter your preferred domain (like
scayle.com) for your application and then click the "Add Domain" button. This must be a domain your organization already owns, not just any domain.
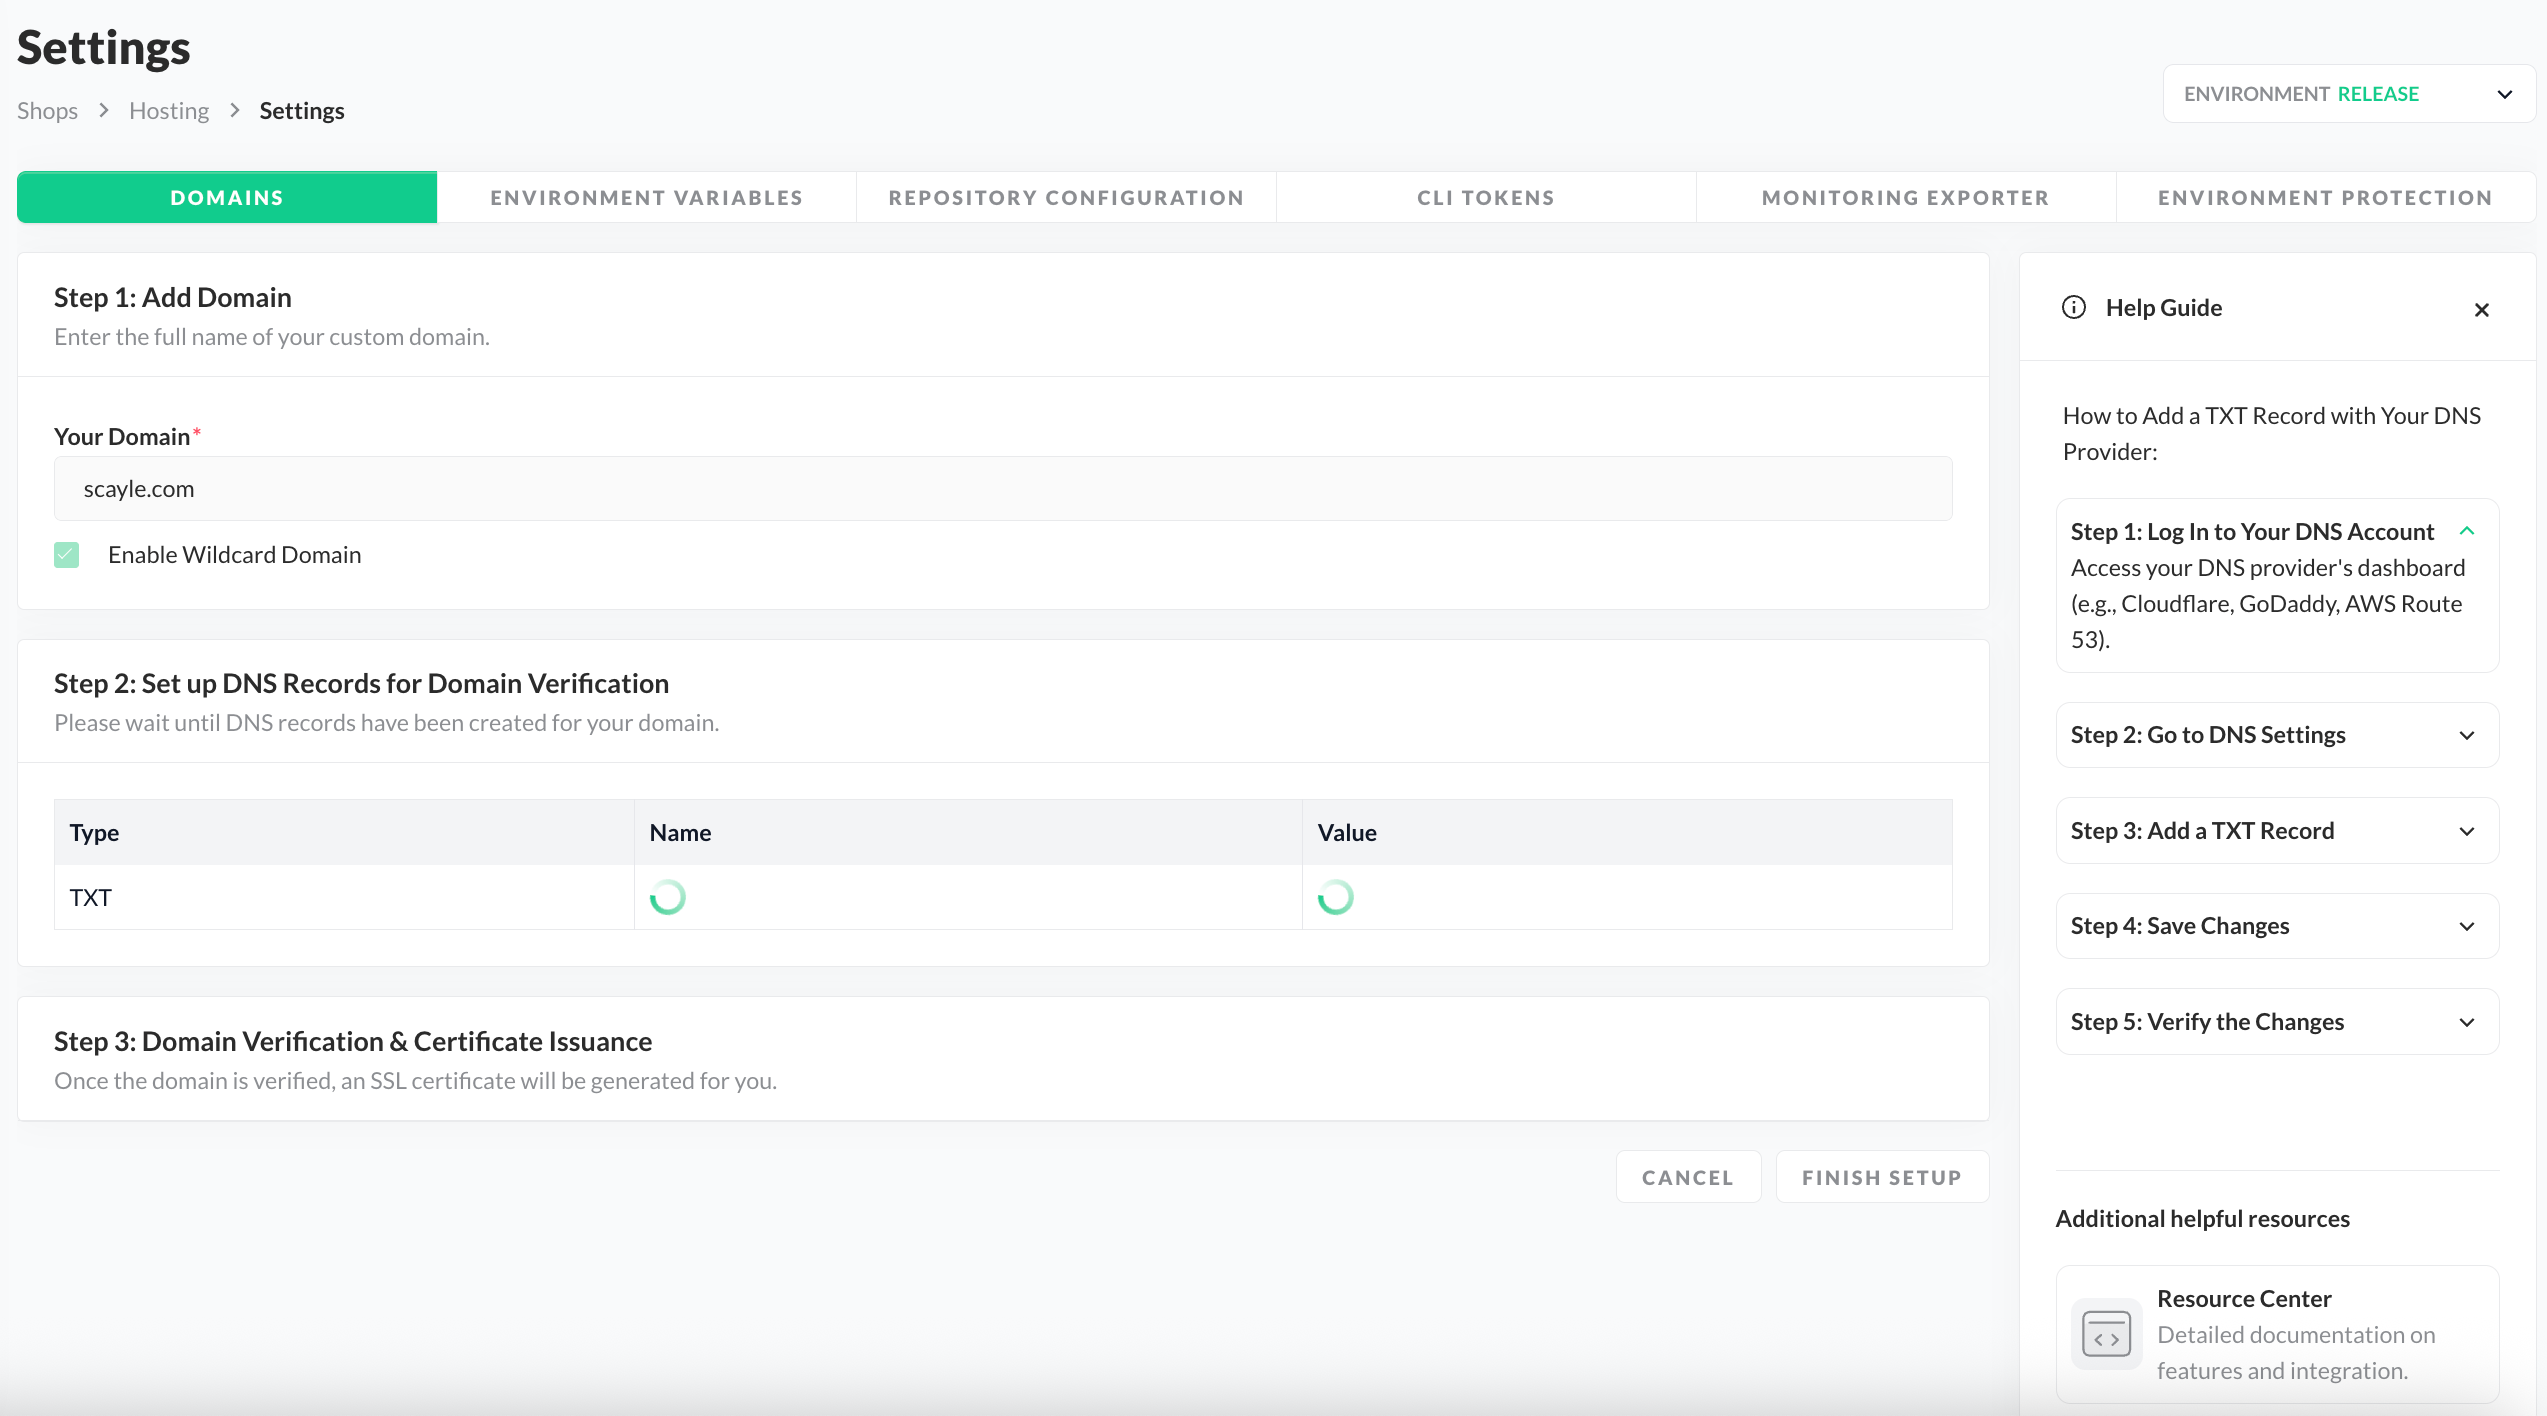
Optionally, check "Enable Wildcard Domain" if you wish to support multiple subdomains using only one custom domain entry.
With this setting, we allow a single application configuration to serve traffic for an unlimited number of subdomains (such as de.scayle.com, en.scayle.com, nl.scayle.com, and others) under your main domain.
Step 2: Set up DNS Records for Domain Verification
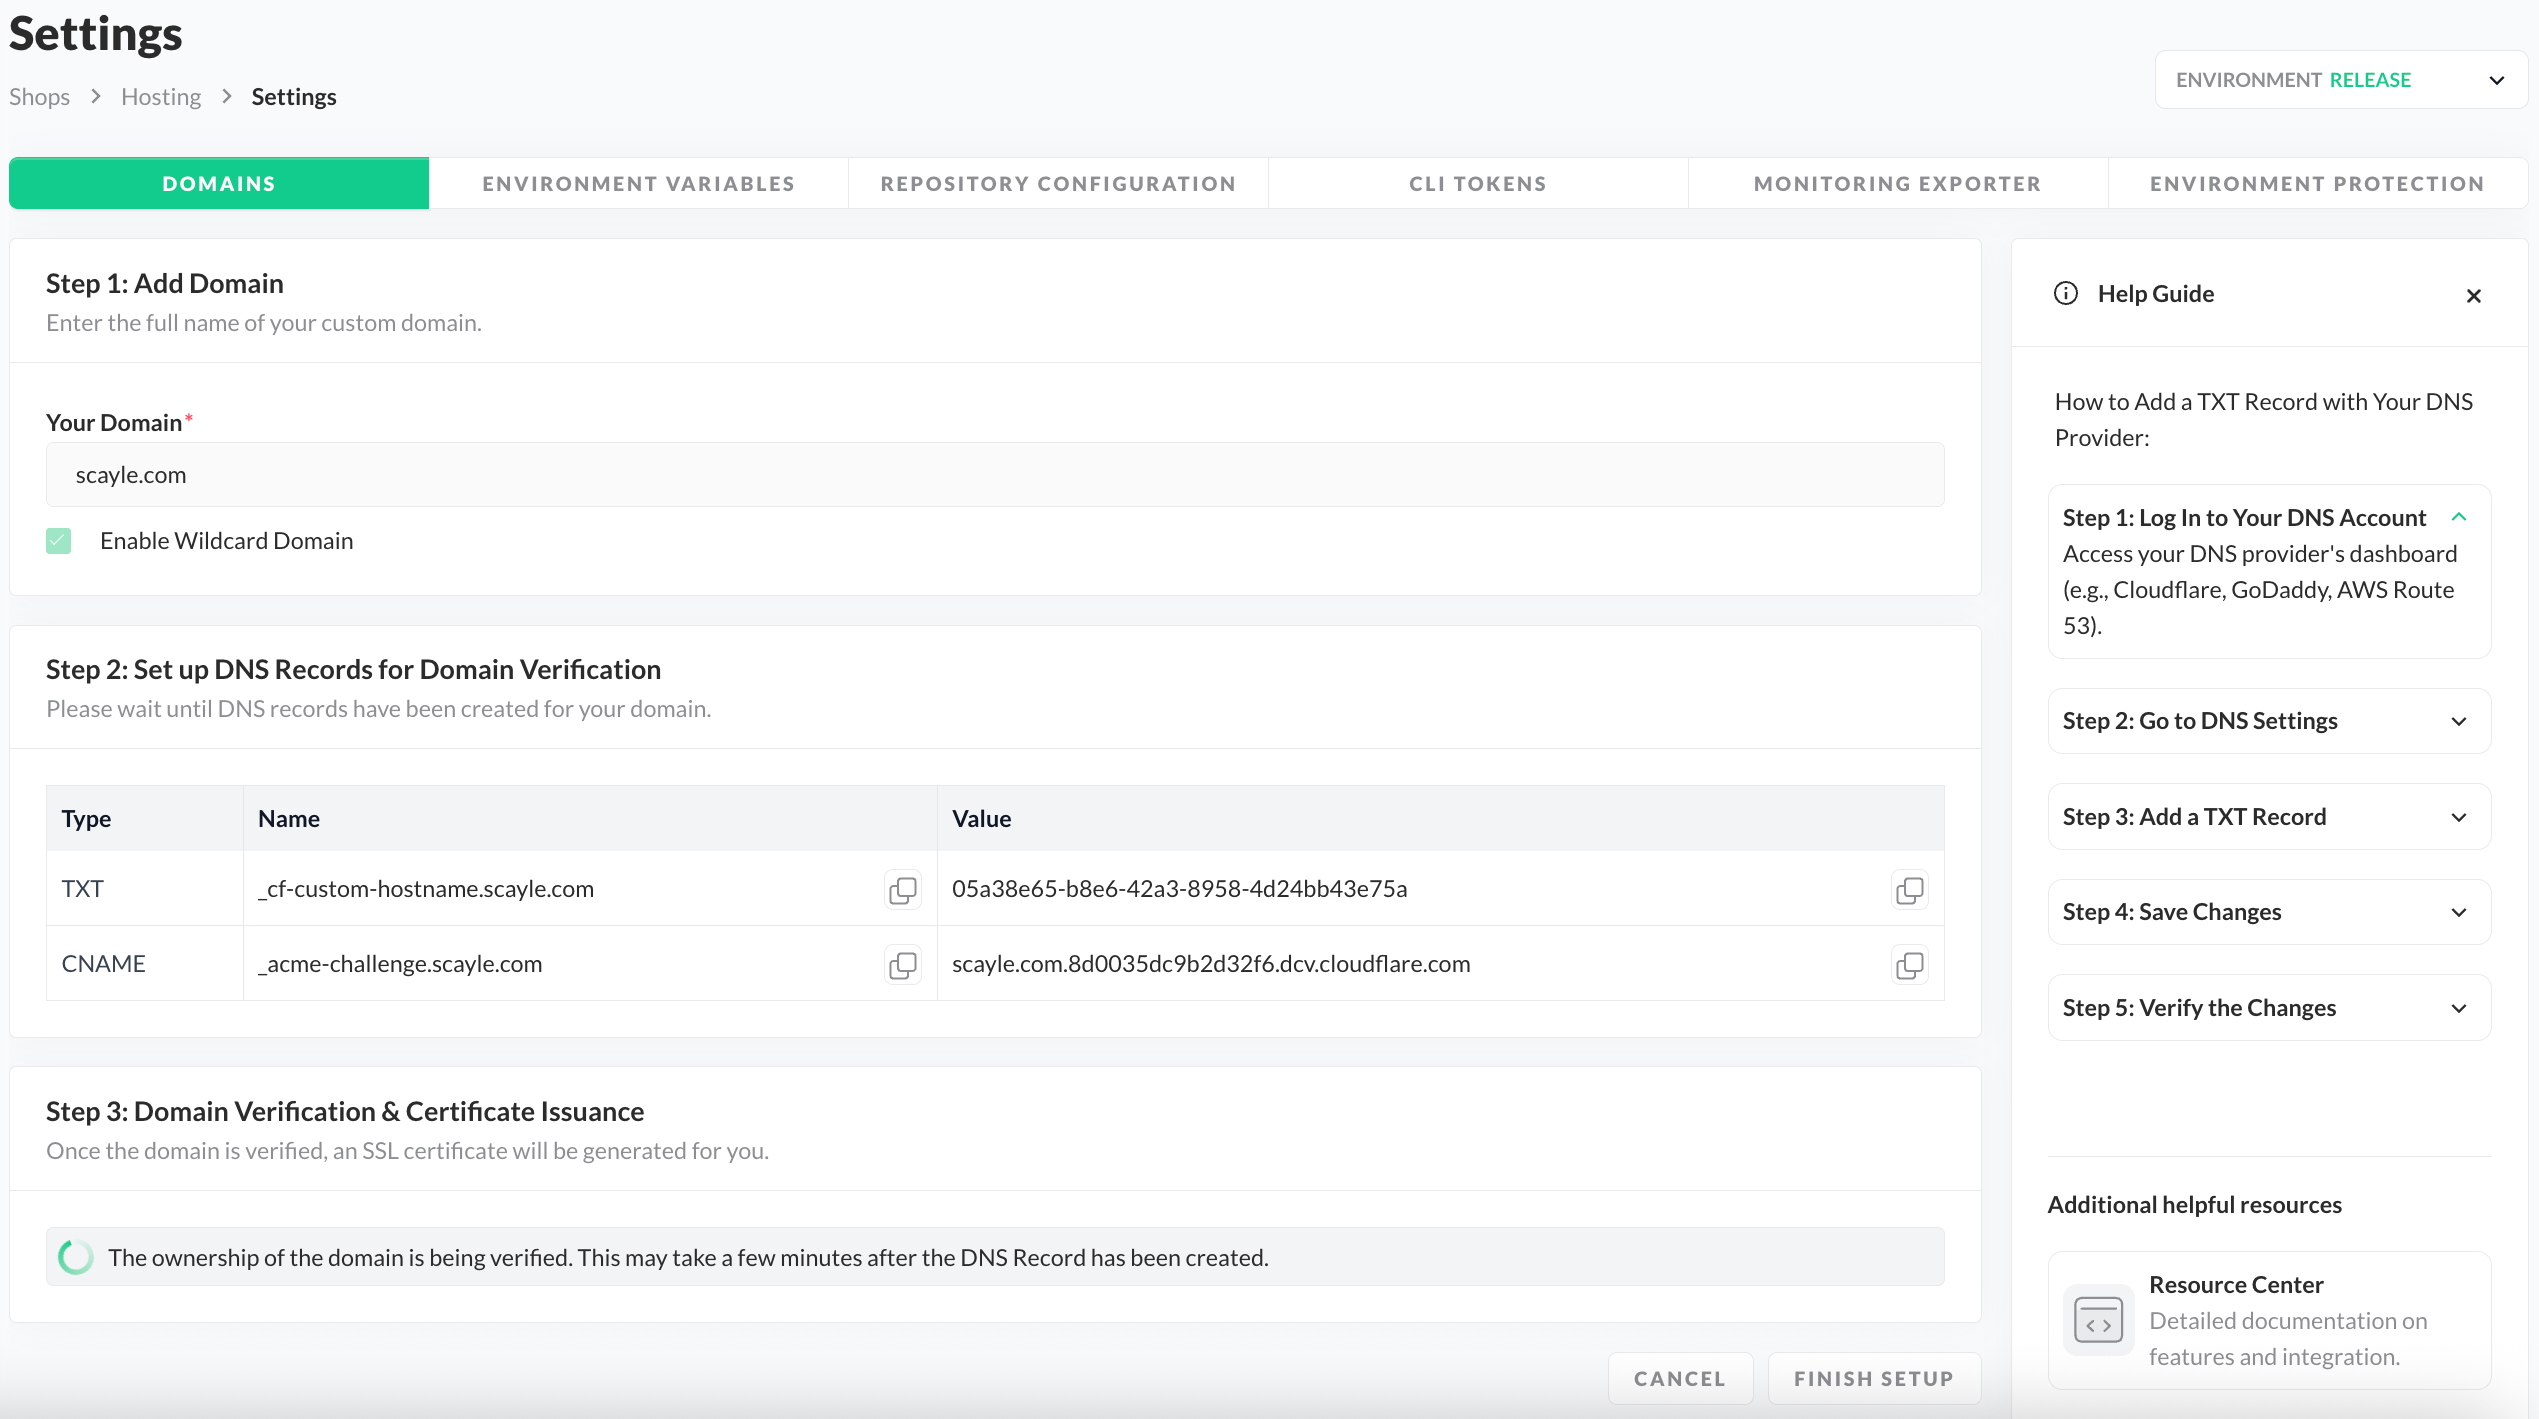
- Once you request domain creation, we'll contact our partner Cloudflare and provide you with a TXT Record and CNAME Record, which are crucial for verifying your domain ownership and enabling the auto-renewing SSL for your domain.
| Type | NAME | VALUE |
|---|---|---|
| TXT | This is the specific subdomain or host associated with the TXT record. | This type of DNS record allows you to store arbitrary text data associated with your domain. |
| CNAME | This is the specific validation label, which Cloudflare uses to confirm domain ownership for automated SSL renewal. | This is the unique destination address to which the verification process is directed to enable auto-renewal. |
In most cases, the TXT Record and CNAME Record should be created shortly after adding a domain. After these values are provided, use them to set TXT and CNAME DNS Records inside your DNS Provider according to the instructions provided in the section below.
Pending TXT & CNAME Records in Domain Creation
Step 3: Domain Verification & Certificate Issuance
- Once we provide you with the TXT and CNAME records, Step 3 in the domain creation process begins.
- This verification is a prerequisite for securing your Storefront Application with an SSL certificate and enabling HTTPS.
Pending Verfication and SSL Certificate
Depending on Cloudflare, this process might take some time. Therefore, you can click the "Finish Setup" button and proceed with other tasks while the domain verification and certificate generation complete in the background.
On the main Domains Overview Page, Ownership Verification Pending status indicates that your domain is still being verified and SSL Certificate Pending status that a certificate is still being generated. Once the status changes to Valid SSL Certificate, your domain has been successfully verified, and the necessary SSL certificate is provided.
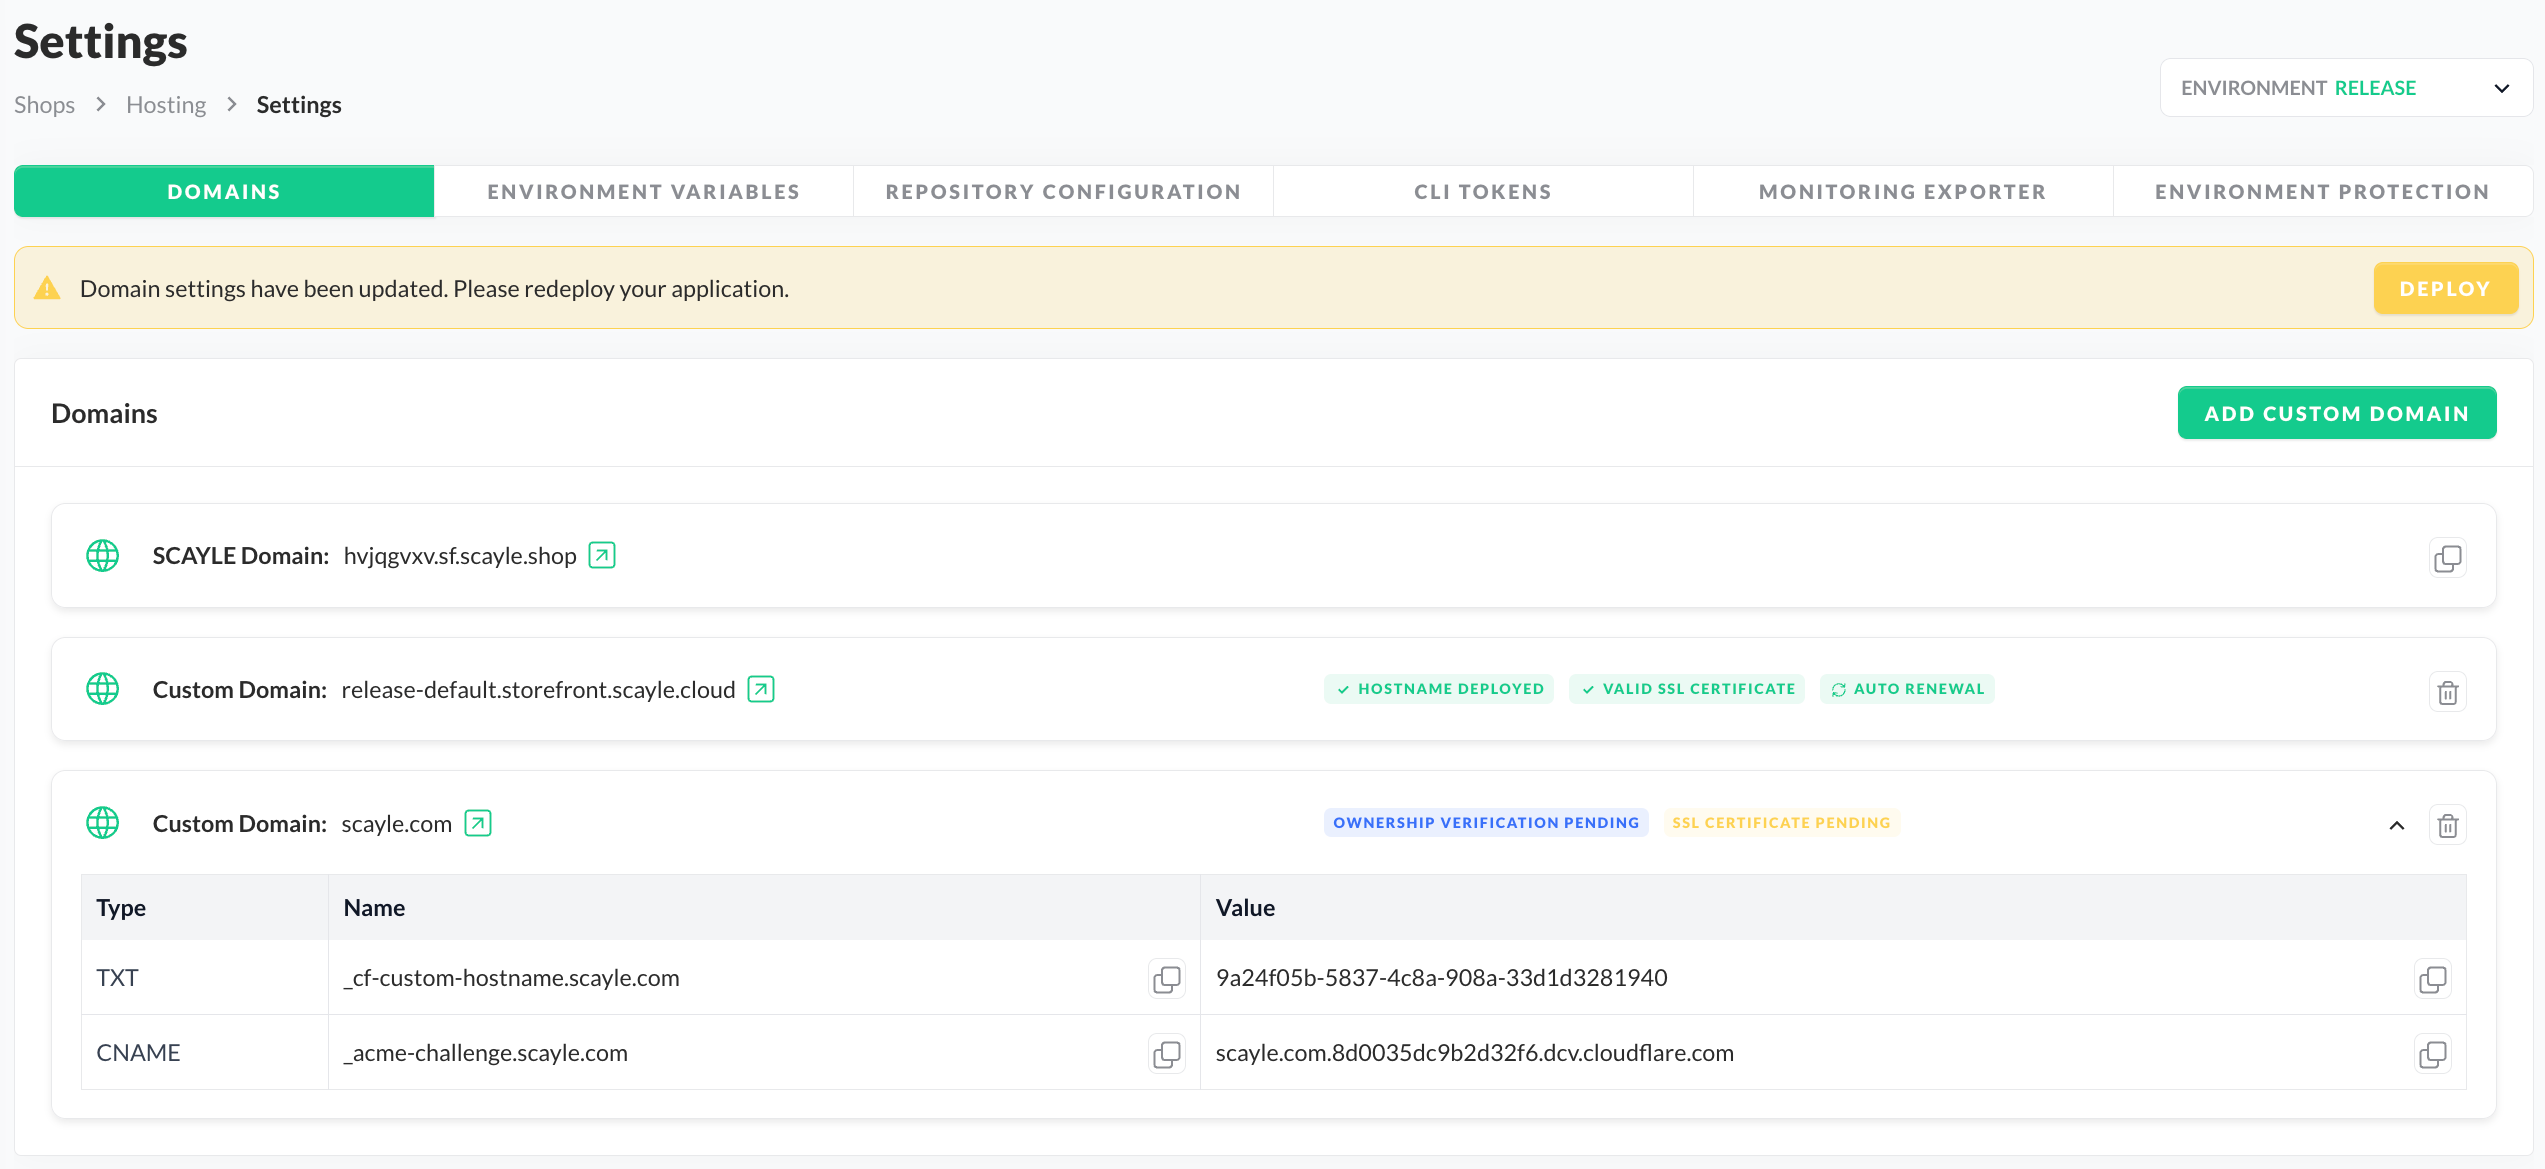
Domains Overview
Keep in mind that whenever you create a new custom domain, the change will only take effect upon redeploying your Storefront Application. To do so, simply click "Deploy" in the banner that appears and follow the regular deployment process as described in the "Deployment in Progress" section.
Here are additional statues that can be shown for your domain:
Wildcardsstatus: Shown only in case you decided to enable wildcards for your custom domain, as explained in Step 1.Auto Renewalstatus: Shown next to the domain with aValid SSL Certificatestatus. It indicates there's no further action required from you, as we'll automatically handle the renewal process for that domain.Hostname Deployedstatus: Shown next toAuto Renewal&Valid SSL Certificateones. It indicates that our Storefront Hosting Platform successfully provisioned the domain and is ready to receive traffic.
Custom Domain Limits
- Only one custom domain can be created per environment.
Wish to increase the limit? Please contact your SCAYLE Account Manager for support.
Adding TXT and CNAME Records for your DNS Provider
After setting up a new custom domain on Storefront Hosting, upon successful completion of Step 2, you will be provided with two records:
- TXT: Used to verify the ownership of your custom domain and activate the hostname on Cloudflare.
- CNAME: Used to enable the auto-renewing SSL for your custom domain.
Both of these records help us confirm you own your custom domain by matching the specific text strings that only you could have placed in your DNS records. You will need to complete these two verification steps and place the records in your DNS provider before you can direct traffic from your custom domain to your Storefront Application, hosted on SCAYLE.

Custom Domain TXT and CNAME Records
Here's a quick general guideline on how to add a TXT Record and CNAME Record for your DNS provider:
- Log In to Your DNS Account: Access your DNS provider's dashboard (e.g., Cloudflare, GoDaddy, AWS Route 53).
- Go to DNS Settings: Select the domain you want to edit and open its DNS "Settings" or "Manage DNS" section.
- Add a TXT Record:
- Type: Select TXT.
- Name: Enter the TXT Name provided (e.g.
_cf-custom-hostname.scayle.com). - Value: Paste the TXT Value provided (e.g.
2248259d-b805-46df-892a-fa35bc649bce). - TTL: Leave as default (e.g. 1 Hour).
- Save Changes: Click "Save" to add the TXT record. Changes may take up to 48 hours to propagate.
- Add a CNAME Record:
- Type: Select CNAME.
- Name: Enter the CNAME Name provided (e.g.
_acme-challenge.scayle.com). - Value: Paste the CNAME Value provided (e.g.
scayle.com.8d0035dc9b2d32f6.dcv.cloudflare.com). - Proxy Status: Set as "DNS Only".
- TTL: Leave as default (e.g. 1 Hour).
- Save Changes: Click "Save" to add the CNAME record. Changes may take some time to propagate.
- Verify the Changes: Return to our platform and wait until the domain is verified, which will be indicated by the statuses next to the domain.
To ease the setup in the Storefront Hosting, we've also included these instructions in our Help Guide.
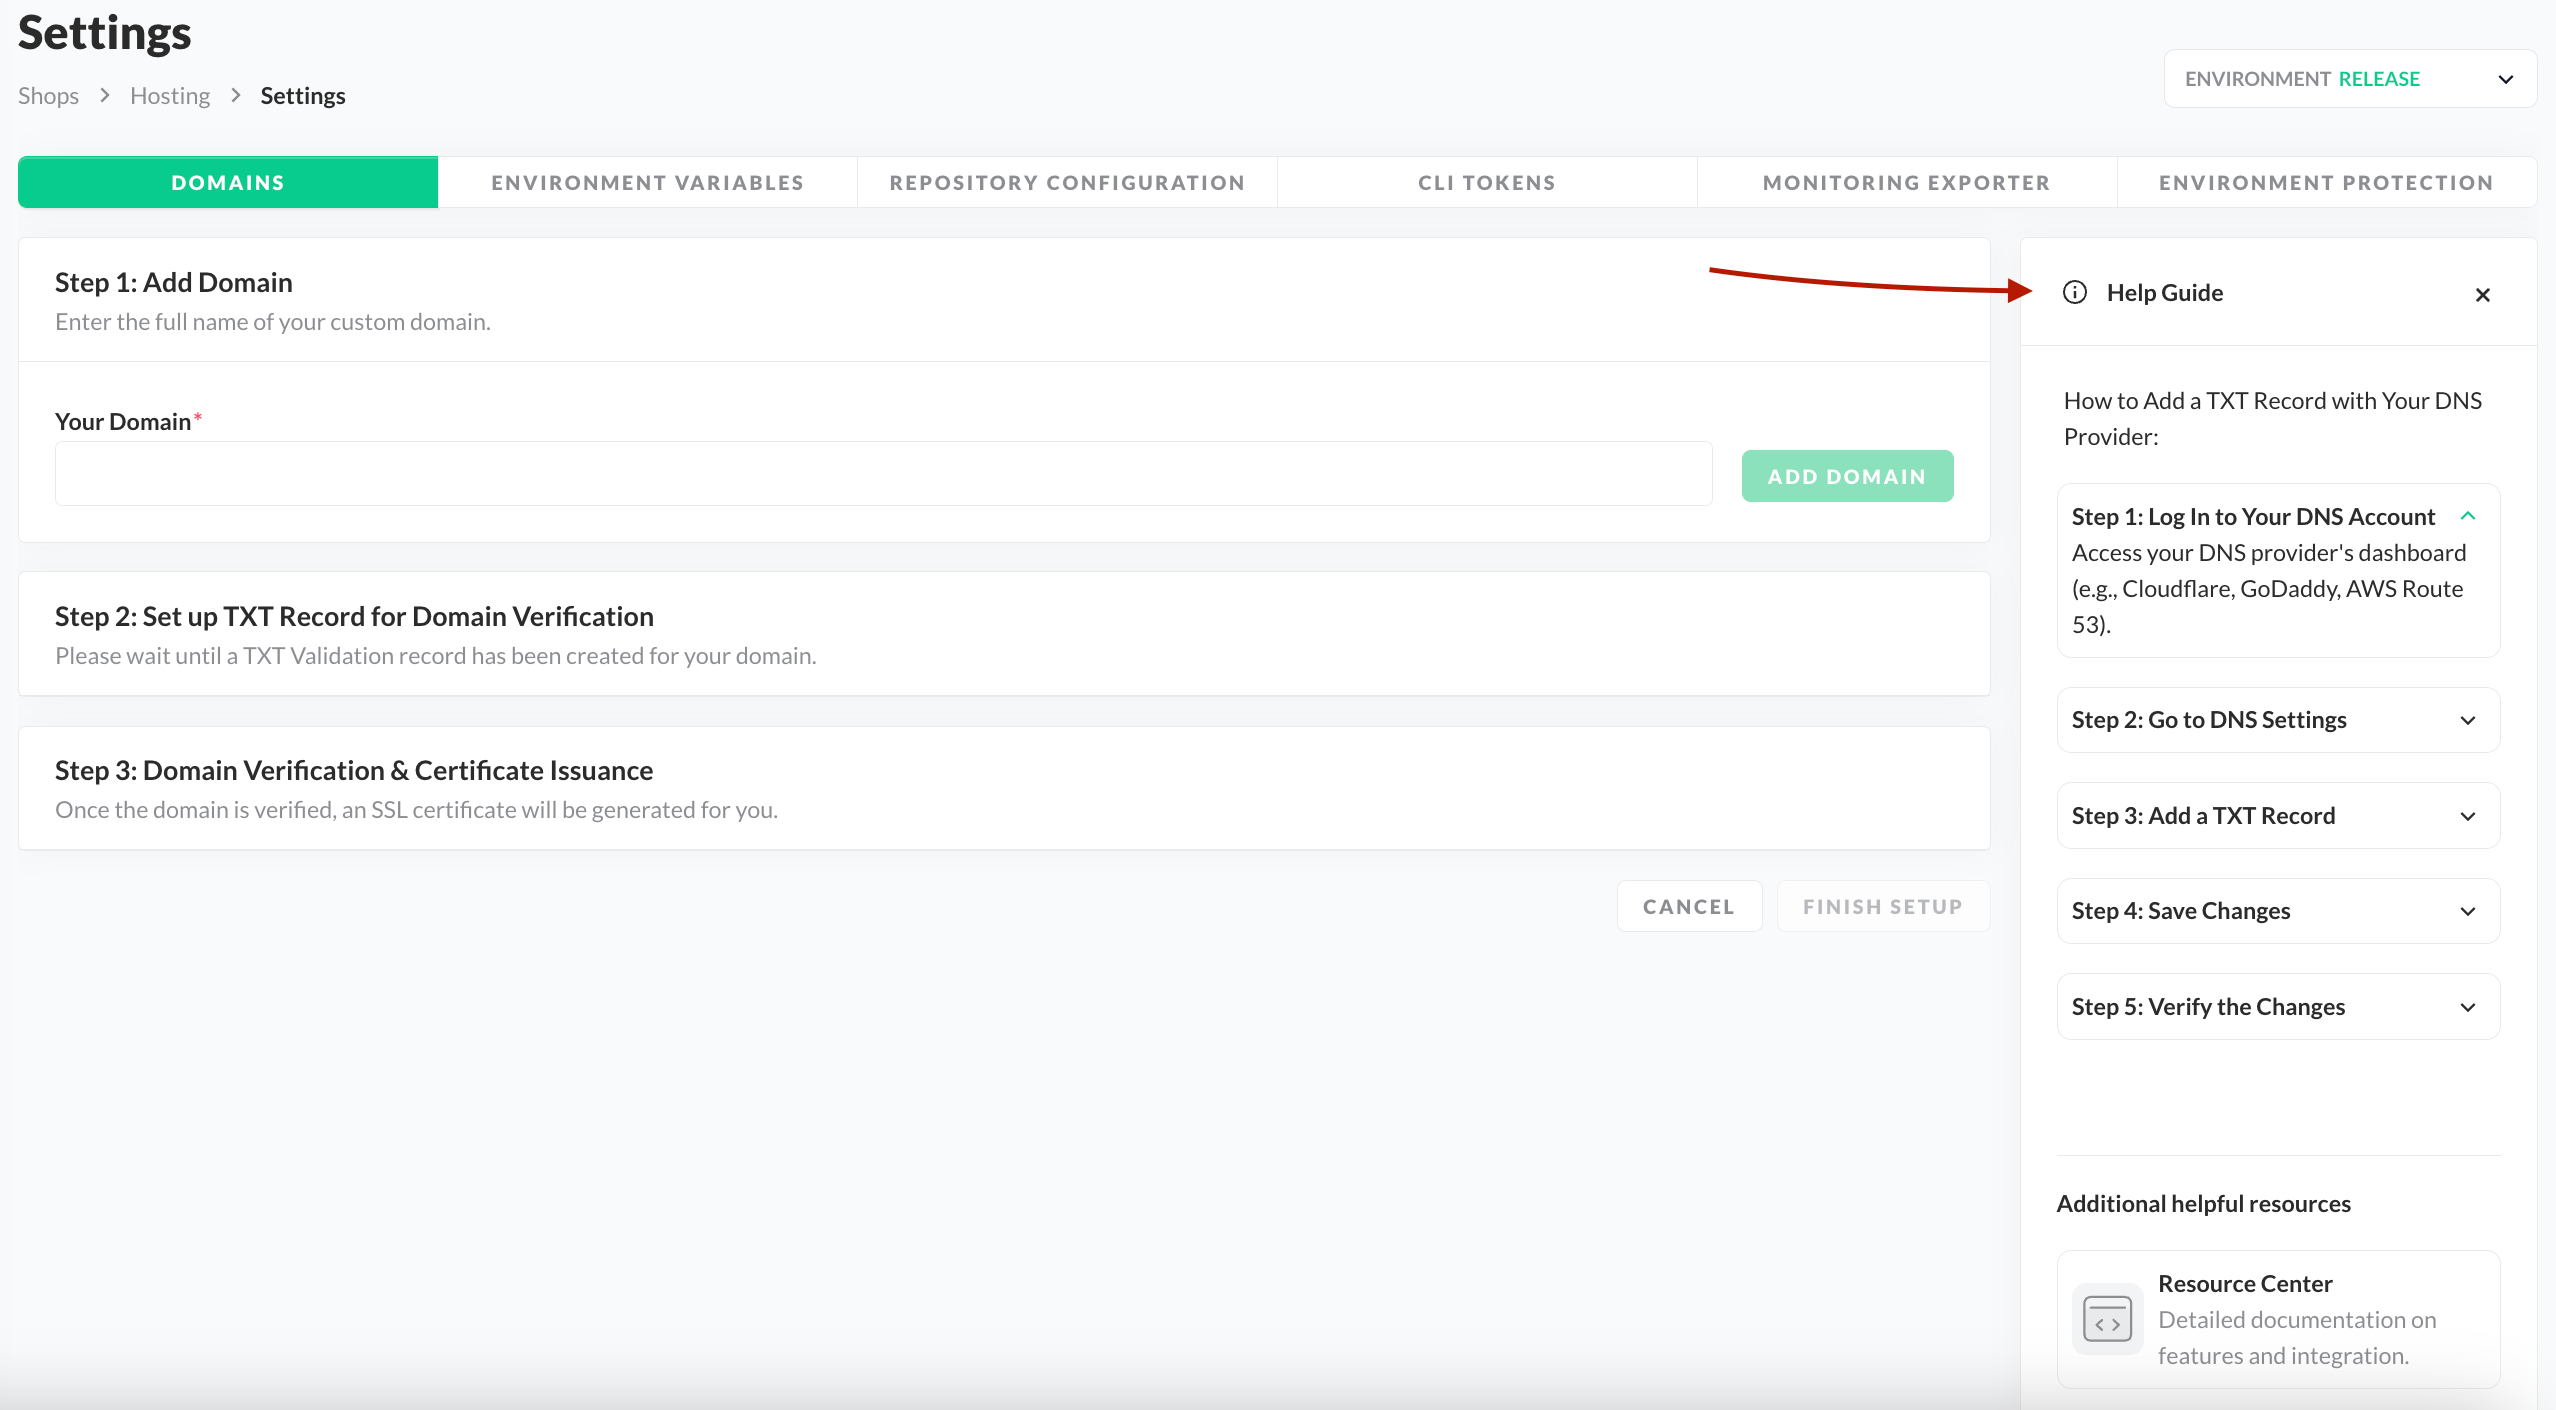
Help Guide
Once you have completed this task, the custom domain will be active from our side and is ready to receive traffic.
To then send traffic from your custom domain to your Storefront Application hosted on SCAYLE, simply change the DNS Record for your custom domain inside your DNS Provider to a CNAME Record with the value of the internal SCAYLE Domain (*.sf.scayle.shop).

Copying the Internal SCAYLE Domain
With this as a last step, you are ready to use your new custom domain fully.


