

Environments
Environments allow you to host multiple versions of your shop at the same time.They let you separate development work from production traffic - for example, a QA environment for testing changes before they reach customers.
Each environment has its own set of deployments, environment variables, and configuration, so changes and deployments made in one environment do not impact any other environment.
How environments are created
When you connect your Git repository in the Overview section, your shop's first environment is created automatically. Most teams add additional environments later - for example, separate environments for staging, QA, or testing different features in parallel.
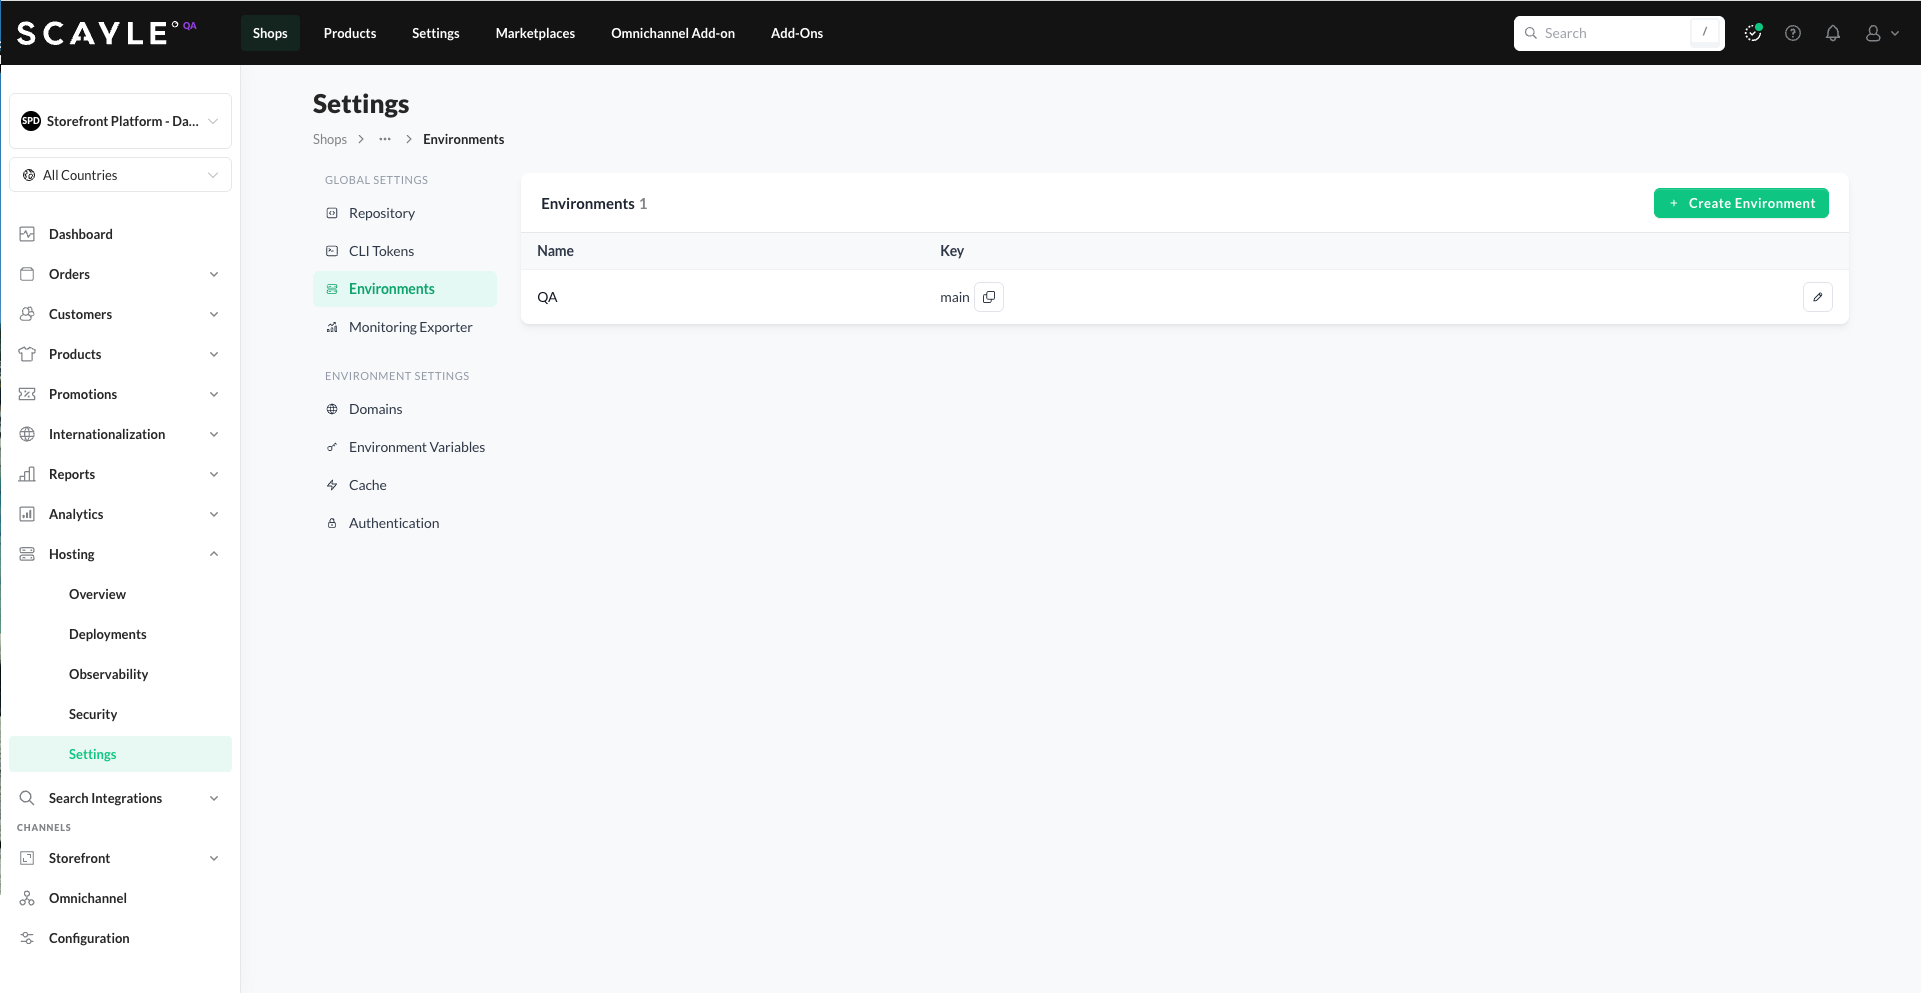
Create an environment
- Go to Shops ➜ [Shop] ➜ Hosting ➜ Settings ➜ Environments.
- Click + Create Environment in the top right.
- Fill in the form:
- Name - a display-friendly label like Production, QA, or Staging. You can edit this later.
- Key - a permanent, unique identifier for the environment, used internally and in CLI commands. The key cannot be edited after creation.
- Initialize environment variables - when checked, the new environment is seeded with the default set of environment variables the Storefront Application requires to run. Leave this checked unless you intend to add every required variable manually.
- Click Create Environment.
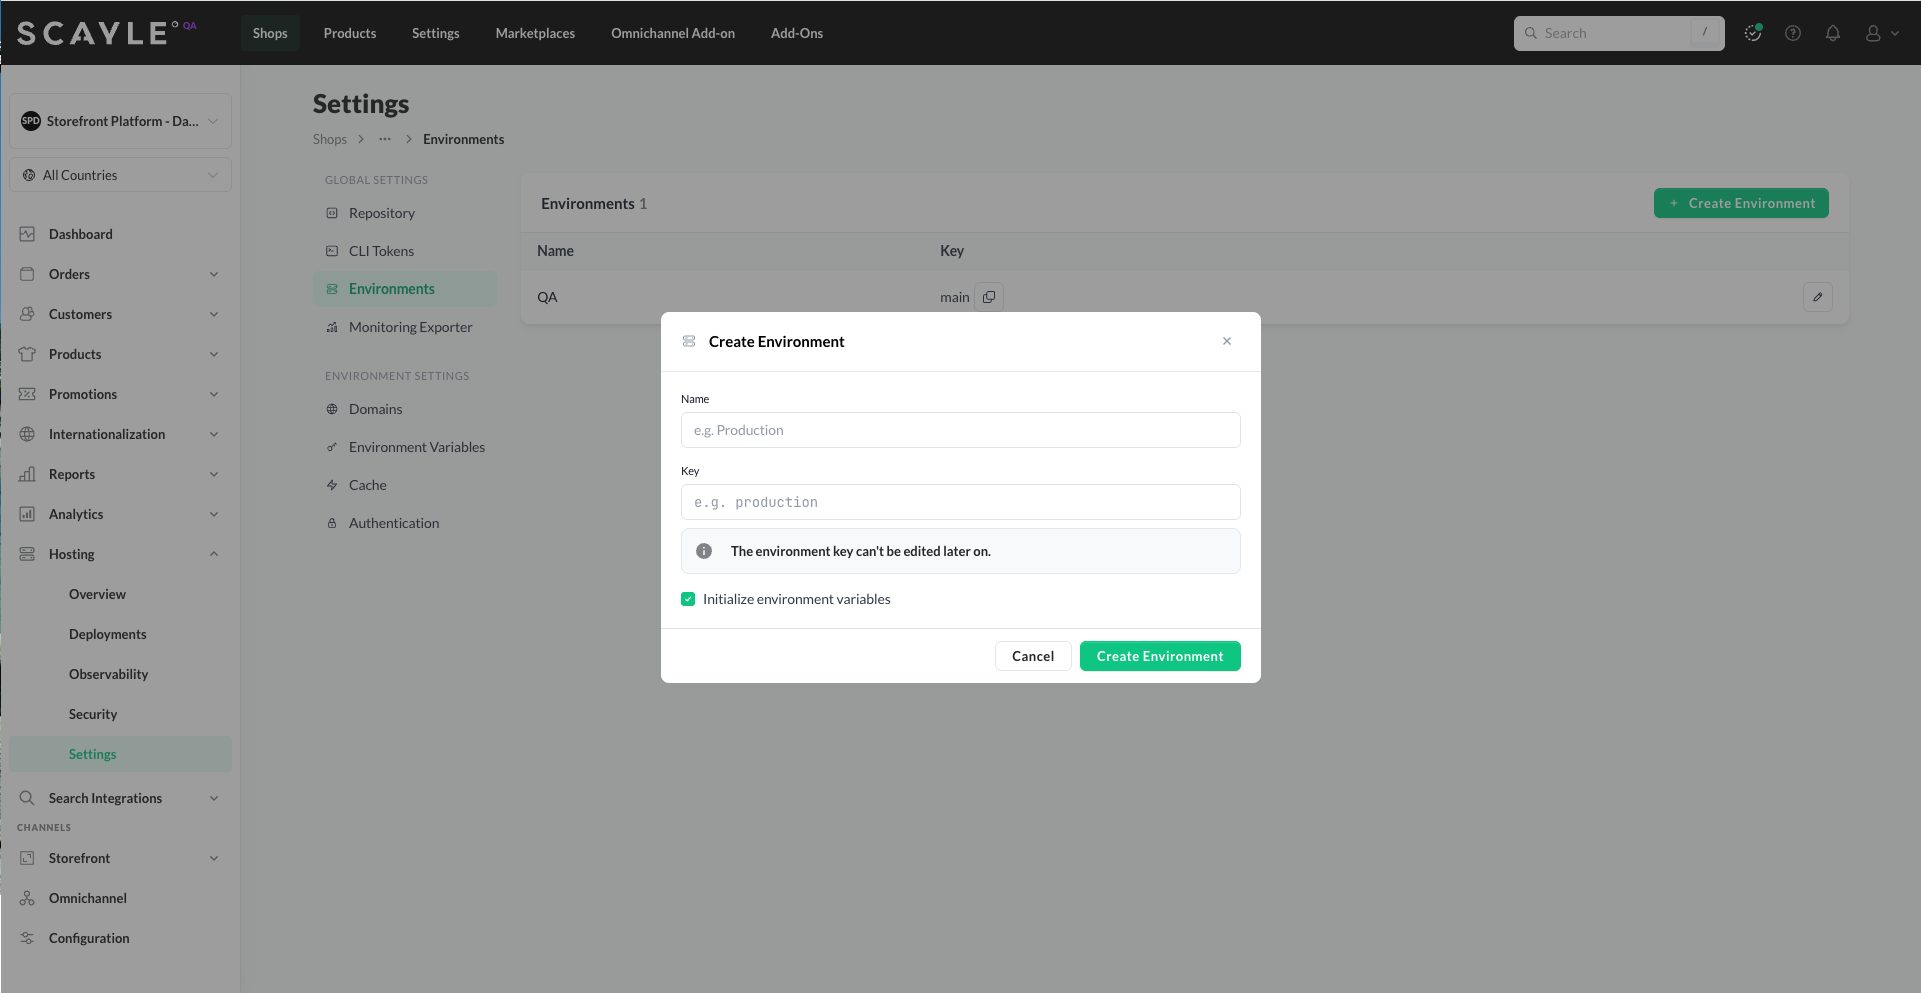
Keep Initialize environment variables checked for most cases. The Storefront Application depends on a baseline set of variables to run. With this checked, those required variables are created automatically - some with per-environment values generated on the fly - so your new environment is ready to deploy. If you uncheck it, you'll need to add every required variable manually in the Environment Variables tab before deployments succeed.
Choose your environment key carefully. Because the key is permanent and used by external systems (CLI commands, CI/CD pipelines, the Hosting API), changing it later requires creating a new environment and migrating your setup. Pick a clear, stable name like production, staging, or qa.
Edit an environment
To update an environment's display name:
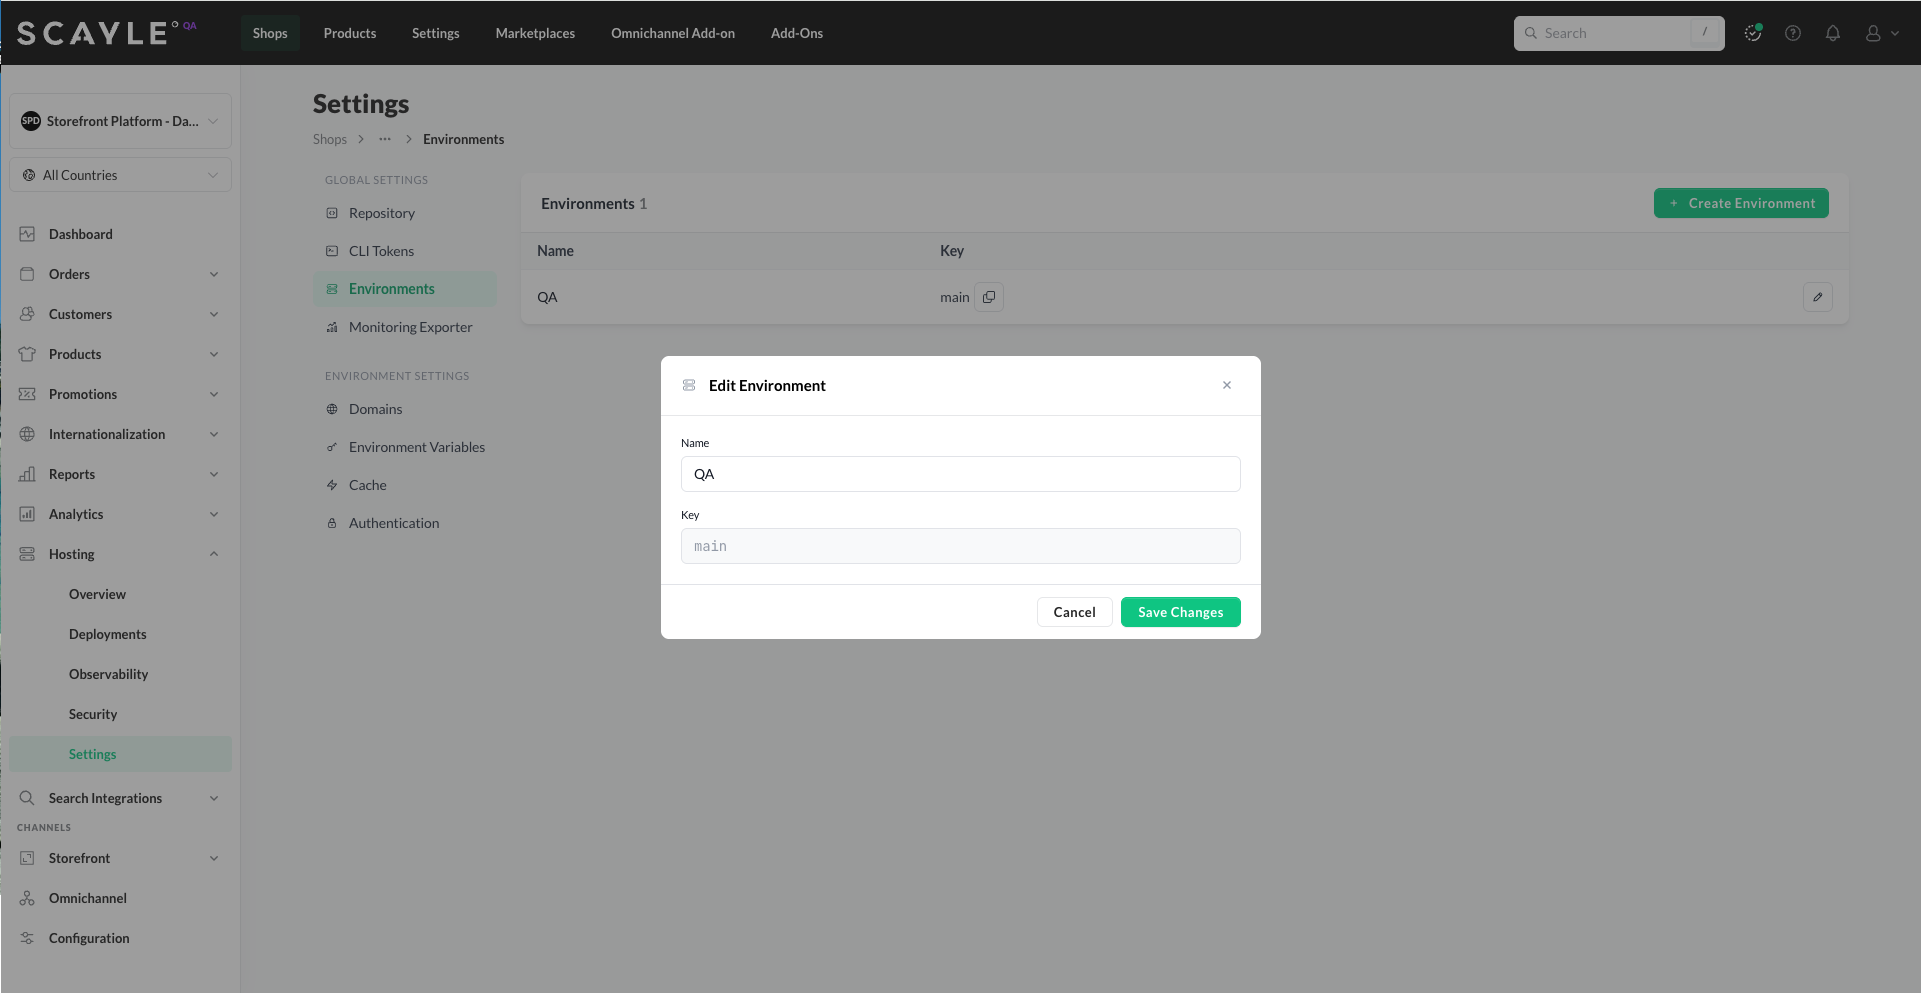
- In the Environments list, click the pencil icon on the row for the environment you want to edit.
- Change the Name field.
- Click Save Changes.
The environment key is shown but cannot be modified.
Deleting an environment
Deleting an environment is not currently supported. If you need to remove an environment from your shop, reach out to your SCAYLE Account Manager.
What lives at the environment level
Each environment maintains its own:
- Deployments - every deployment is targeted at a specific environment.
- Environment variables - variables are scoped per environment, so production secrets don't leak into staging.
- Domains - custom domains map to specific environments.
- Logs and metrics - observability data is filtered per environment.
- CDN cache - purge applies to a specific environment.
This separation means you can safely test changes (new env vars, new domains, deployment promotions) in a non-production environment before applying them to live traffic.
Limits
| Limit | Value |
|---|---|
| Environments per shop | 1 for non-live spaces, 2 for live |


